MYSQL DataBase testing using Selenium WebDriver-Step by Step Guide:
-
Introduction
SQL Part of “MYSQL” stands for Structured Query Language. MYSQL is a relational database from oracle where data is stored in tables.
MYSQL is open source and it is very fast, reliable and easy to use. MYSQL works in a client/server architecture. -
Download
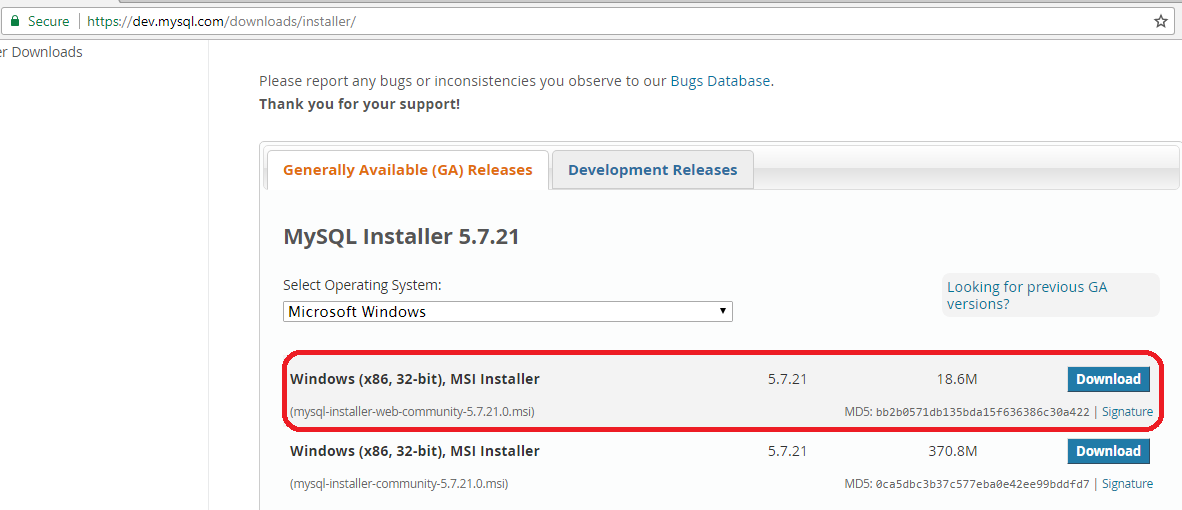
To Download the MYSQL please access the following URL->https://dev.mysql.com/downloads/installer/.
Select the Windows (x86, 32-bit) MSI Installer to download the software. -
Double click on the software to open the installer.
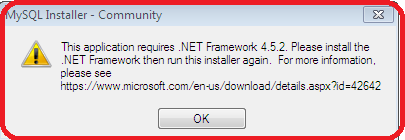
Note:: If you are getting any error as shown below while launching MYSQL Software please download the .NET Framework from this link->https://www.microsoft.com/en-us/download/confirmation.aspx?id=42642 -
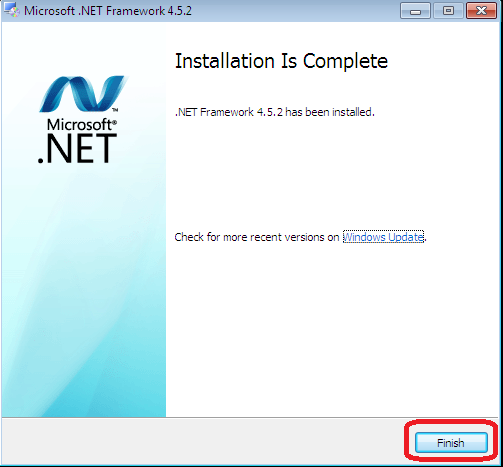
Click on Finish and Restart the System to reflect the changes.
-
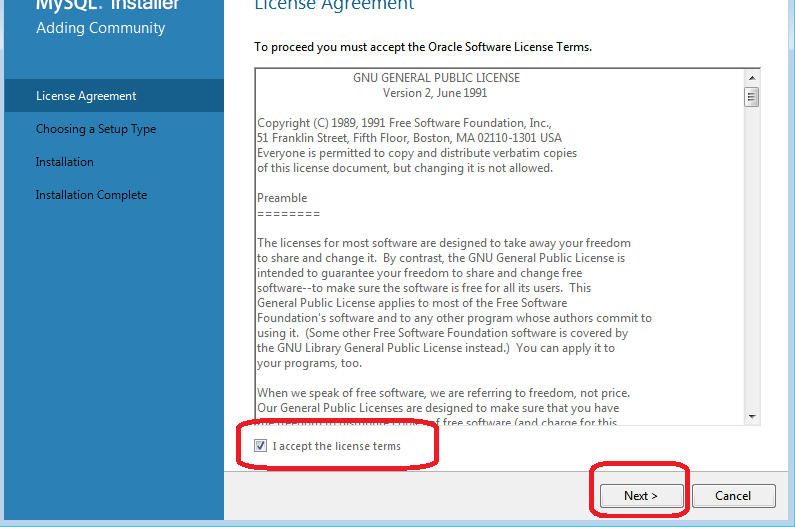
Accept the License agreement and Click on Next.
-
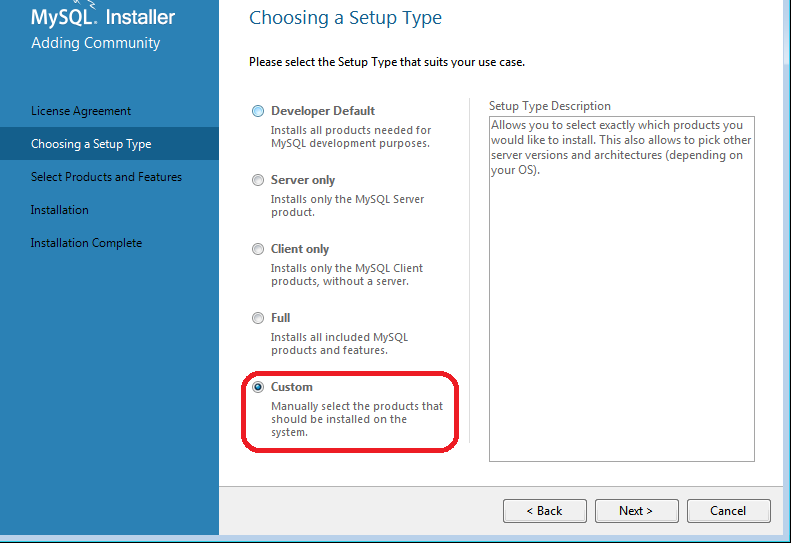
Select the Setup Type as Custom and click on Next.
-
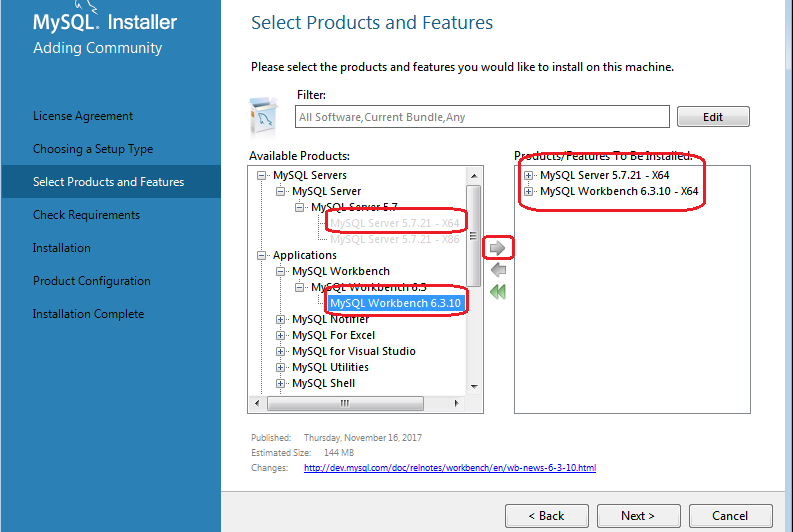
Select the products MYSQL Server and SQL Workbench and click on Next to download.
-
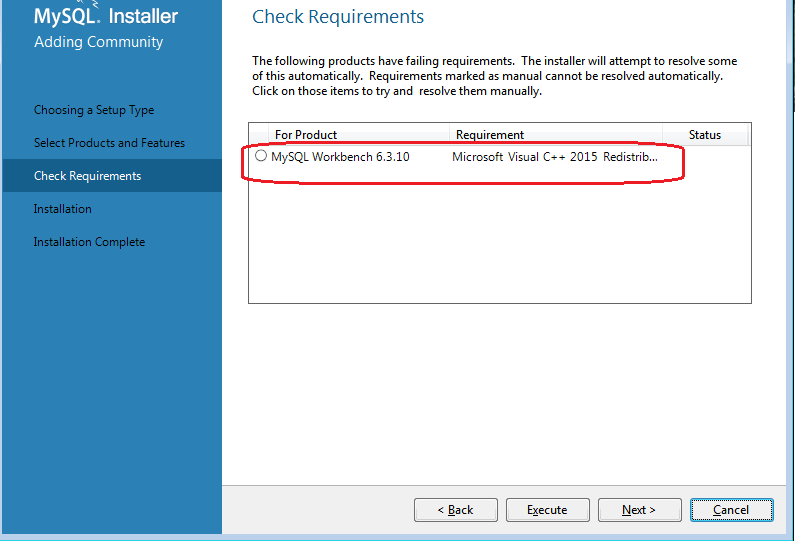
Check Requirements dialog shows the failing requirements.
-
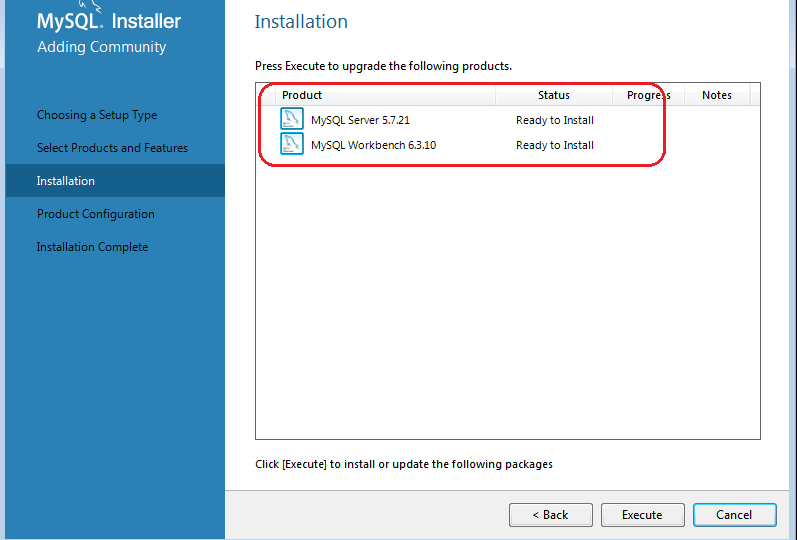
MY SQL Server and Workbench is ready to be installed. Click on Execute to continue.
-
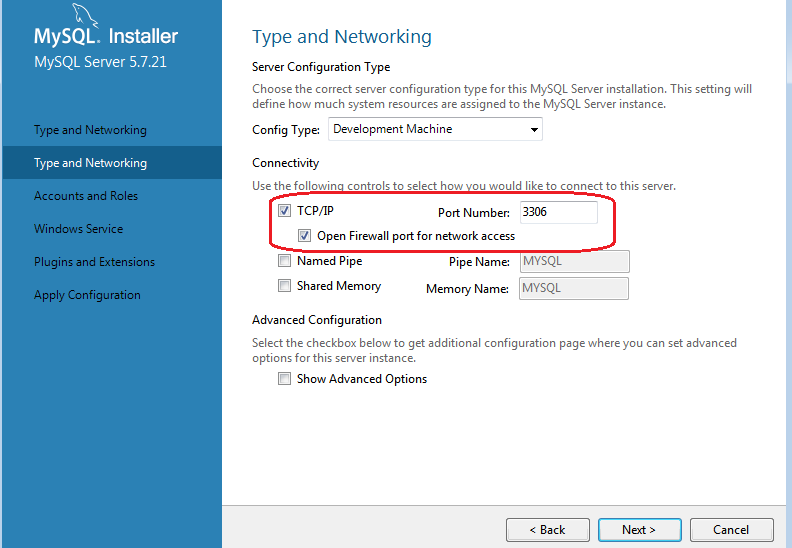
Continue with default values and click on Next.
-
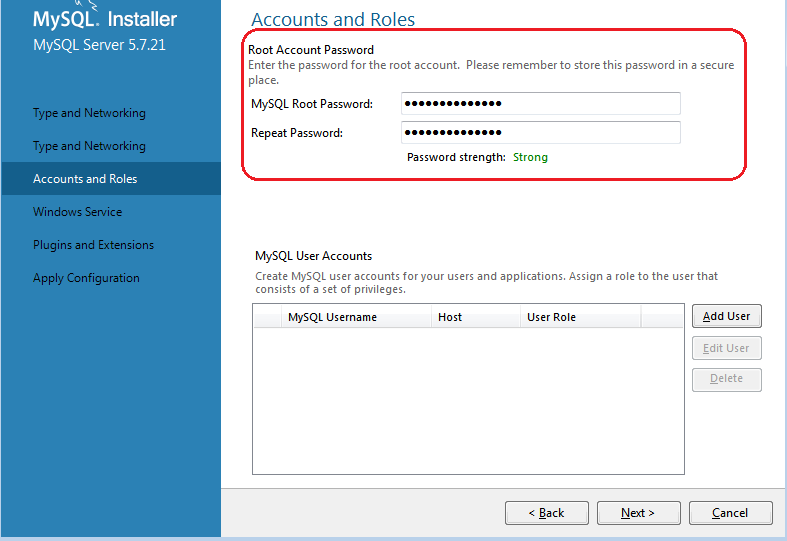
Provide the username and password.
-
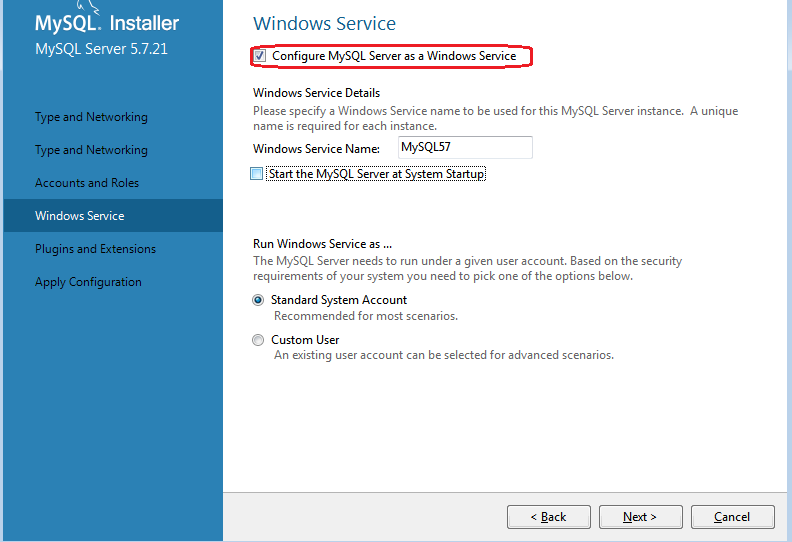
Deselect the option to start the MYSQL Server during System Startup.
-
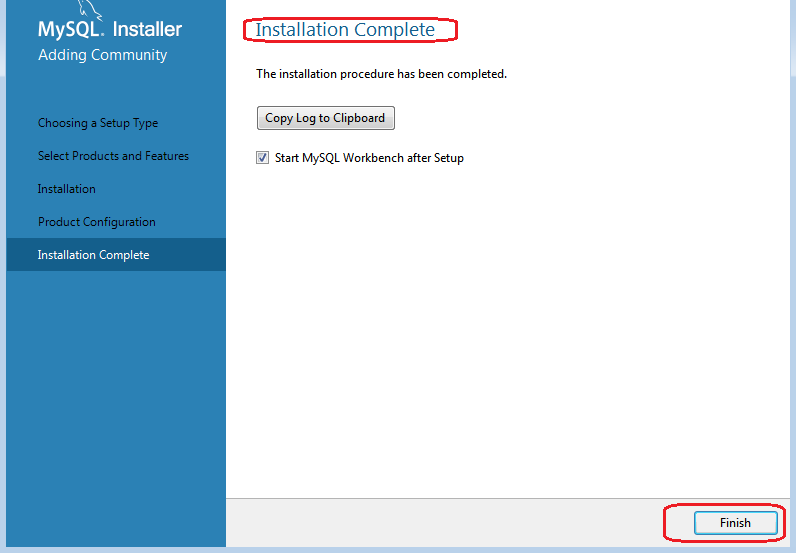
Click on Finish to complete installation.
-
Start the MYSQL Server from the System by accessing ‘services.msc’ from the Start Menu. Select the MYSQL service and click on Start button to start the server.
-
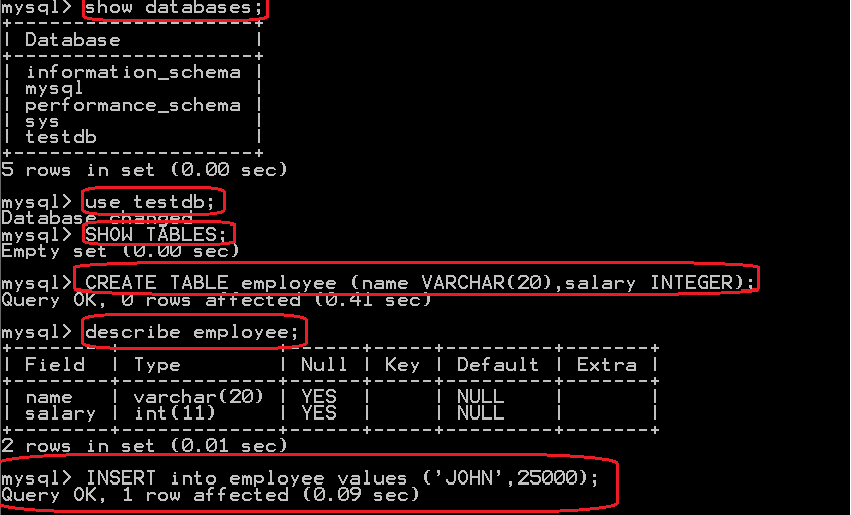
Open MYSQL Command line Client from Start Menu. Execute the following Commands:
- Create Database testDB
- show databases
- use testdb
- show tables
- create table employee (name VARCHAR(20),salary INTEGER);
- INSERT into employee values (‘JOHN’,25000);
- Create a Maven Project add the mysql-connector.jar as an dependency for the project.
-
Execute the following code to retrieve the data from Database ‘testDB’.
-
Please find the console ouput::
Note:: Download the Microsoft Visual C++ from this link ->https://www.microsoft.com/en-in/download/details.aspx?id=40784.
Once the Microsoft Visual C++ setup is successful reopen the installer from the beginning to continue the process of installtation.

This jar file contains “com.mysql.jdbc.Driver” class it must be present in Build path of the project
in order to successful connection to mysql database.Copy the Maven Dependencies information from the
Repository URL mentioned below: https://mvnrepository.com/artifact/mysql/mysql-connector-java/5.1.21
Dependency Infromation:
|
1 2 3 4 |
<dependency> <groupId>mysql</groupId> <artifactId>mysql-connector-java</artifactId> <version>8.0.21</version> |
|
1 2 3 4 5 6 7 8 9 10 11 12 13 14 15 16 17 18 19 20 21 22 23 24 25 26 27 28 29 30 31 32 33 34 35 36 37 38 39 40 41 42 43 44 45 46 47 48 49 50 51 52 53 54 55 56 57 58 59 60 61 62 63 64 65 66 67 68 69 70 71 72 73 74 75 76 77 78 79 |
package com.abc.dbconnection.tests; import java.sql.Connection; import java.sql.DriverManager; import java.sql.ResultSet; import java.sql.ResultSetMetaData; import java.sql.SQLException; import java.sql.Statement; import org.testng.annotations.DataProvider; import org.testng.annotations.Test; public class LoginTests { @Test(dataProvider="DP") public void validateLogin(String uname,String pword) { System.out.println("DB Values: " + uname); System.out.println("DB Values:" + pword); // WebDriverManager.chromeDriver.setup(); // WebDriver driver = new ChromeDriver(); // driver.get(url); // driver.findElement(By.id("")).sendKeys(uname); // driver.findElement(By.id("")).sendKeys(pword); // driver.findElement(By.id("")).click(); } @DataProvider(name="DP") public String[][] feedDP() throws ClassNotFoundException, SQLException { String data[][] =getDBValues("root","root","testdb","localhost"); return data; } public String[][] getDBValues(String uname,String pword,String dbname,String hostip) throws ClassNotFoundException, SQLException { Class.forName("com.mysql.cj.jdbc.Driver"); /* * url a database url of the form jdbc:subprotocol:subnameuser * the database user on whose behalf the connection is being madepassword * the user's password */ String url="jdbc:mysql://localhost:3306/testdb"; String username="root"; String password="root"; Connection con = DriverManager.getConnection(url, username, password); Statement stmt = con.createStatement(ResultSet.TYPE_SCROLL_INSENSITIVE,ResultSet.CONCUR_READ_ONLY); int value = stmt.executeUpdate("INSERT INTO `testdb`.`login` VALUES ('java','java123#');"); System.out.println("The rows are upated "+ value); ResultSet rs = stmt.executeQuery("Select * from testdb.login"); rs.last(); int rows = rs.getRow(); System.out.println("Number of rows " + rows); ResultSetMetaData rsmd = rs.getMetaData(); int cols = rsmd.getColumnCount(); System.out.println("Number of cols: "+ cols); String data[][]= new String[rows][cols]; int i=0; rs.beforeFirst(); while(rs.next()) { for(int j=0;j<cols;j++) { data[i][j]=rs.getString(j+1); System.out.println(data[i][j]); } i++; } return data; } } |
|
1 2 3 4 |
3 2 JOHN 25000 JAMES 15000 SCOTT 10000 |
Guys,
Please use my-sql-connector version to 5.1.46.