Selenium automates browsers like Firefox,Chrome and Internet Explorer.
Selenium WebDriver Scripts run against multiple Platforms MAC,Windows and Linux.
In this tutorial, we will discuss about Running Selenium WebDriver Scripts on Chrome Browser.
Steps to be Followed to Execute Tests on Chrome Browser
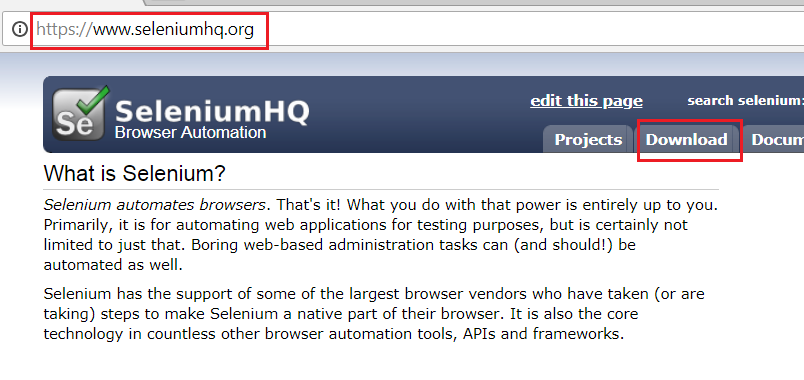
1. Access the URL http://seleniumhq.org and navigate to the Downloads tab.
seleniumhq.org
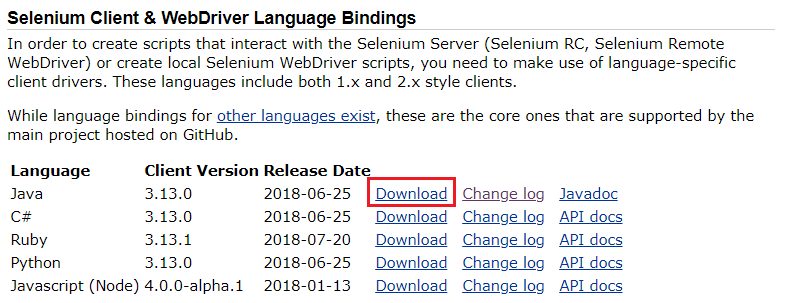
2. Click on the Download Link the Latest version of Selenium Jars.
Selenium Webdriver Latest Version
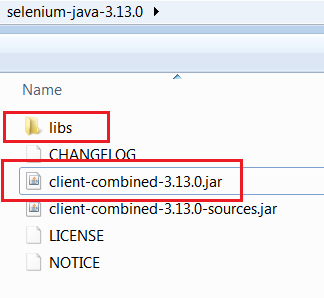
3. Unzip the selenium-java-3.xx.0.zip file and view the contents of the Jar files.
Selenium WebDriver & Library Jar Files
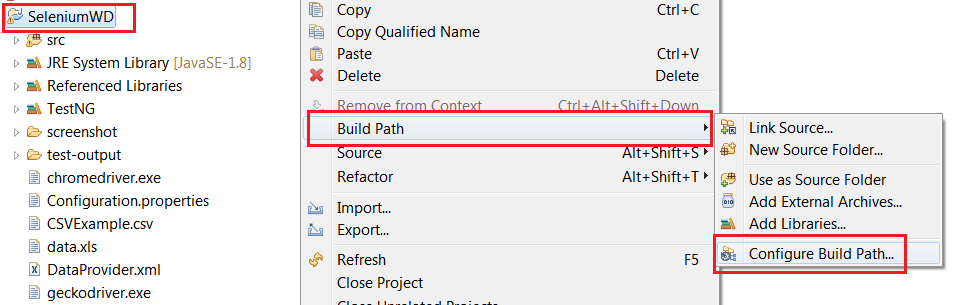
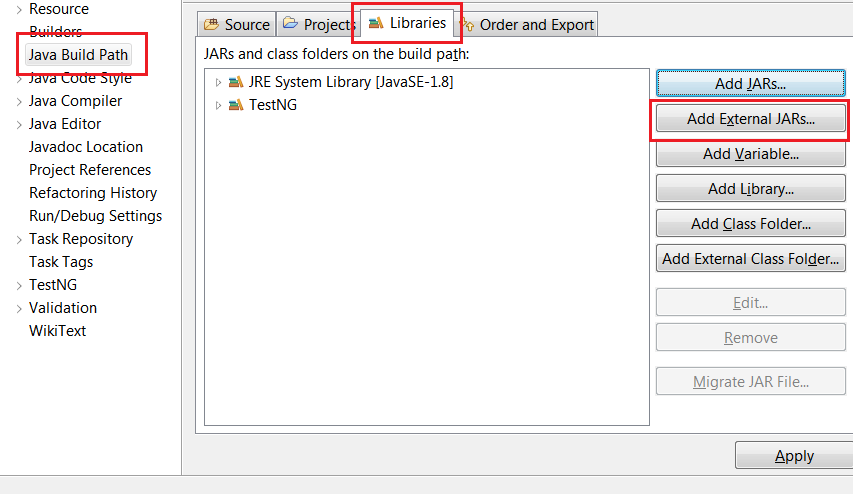
4. Open Eclipse->Right Click on Java Project->Build Path->Configure Build Path.
ConfigureBuildPath
5. Click on ‘External Jars’ button and navigate to the directory where the Selenium Webdriver jars are unzipped in previous Step 3.
AddExternalJars
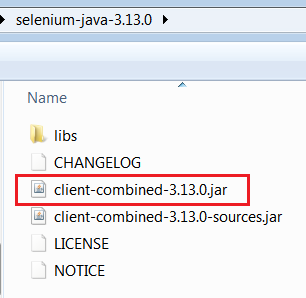
6. Add the External Jar – client-combined-3.xx.0.jar.
client-combined-3.13.0.jar
7. Add the External Jars available under lib folder unzipped in Step 3.
Selenium WebDriver Lib Jars
Update Chrome Browser
1. On your computer, open Chrome browser.
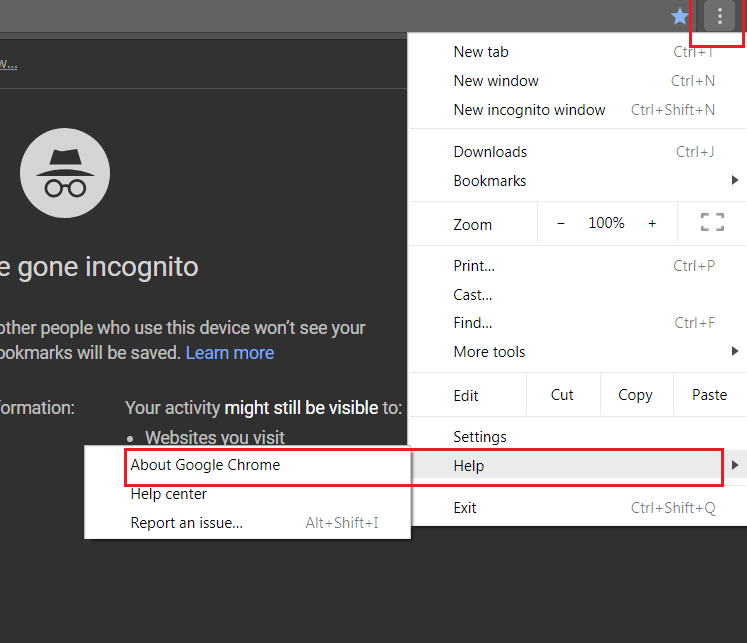
2. At the top right, click More as shown in the below screenshot.
Chrome Browser – Update Chrome
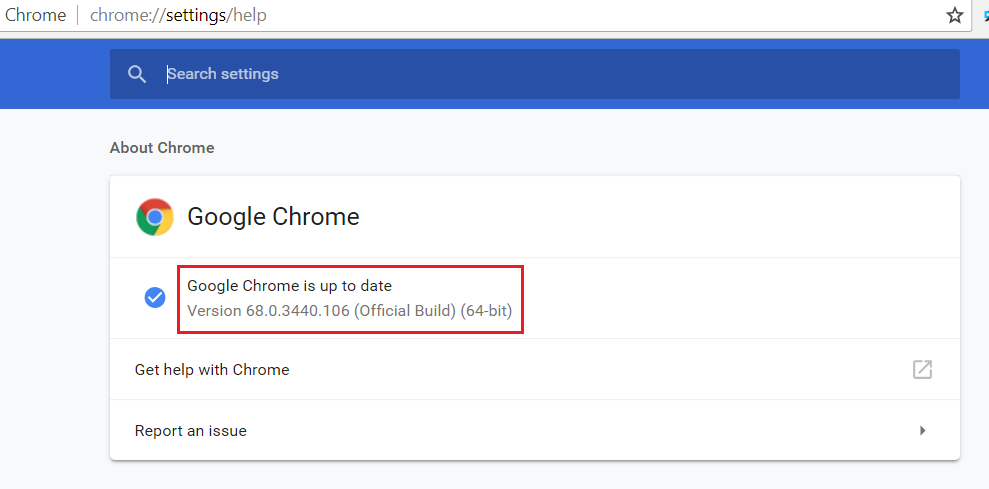
3. Click Update Google Chrome. If you don’t see this button, you’re on the latest version.
Chrome Latest – Version
4. Click Relaunch and verify the Chrome Browser updated to the Latest version.
Download the chromedriver.exe and copy to Java Project.
1. Download the Latest Version of Chrome Driver Executable File from this link. http://chromedriver.chromium.org/downloads
2. Download the Zip file according the Operating System-Windows,MAC,Linux.
Note: For Windows, 64 bit version is not available.
Chrome Latest Version-MAC,WINDOWS,LINUX
3. Unzip the File and look for chromedriver.exe.
Unzip the file and look for chromedriver.exe
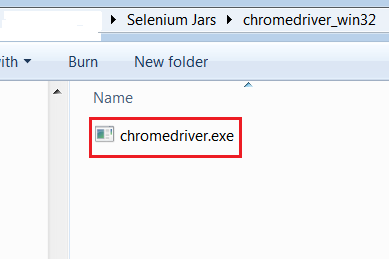
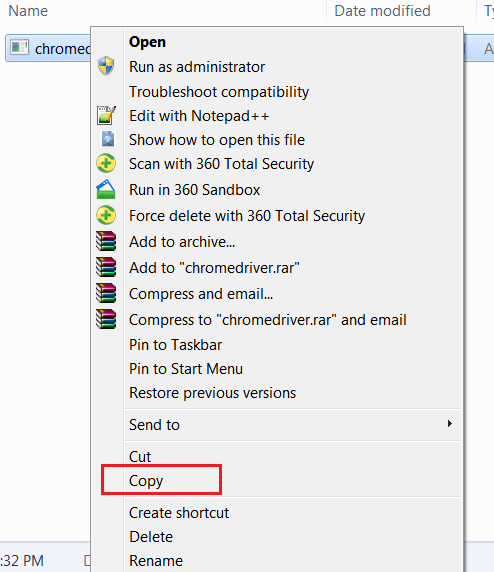
4. Right Click and copy the chromedriver.exe downloaded.
Copy chromedriver.exe
5. Open Eclipse and Right Click on the project in the package explorer and copy the Executable file in
the Java Project.
To disable the Information Logs in the console Firefox:
Add the below statement before instantiating the Firefox Driver instance. System.setProperty(FirefoxDriver.SystemProperty.BROWSER_LOGFILE,“null"); Chrome Browser
Add the below statements before instantiating driver instance.
         ChromeOptions chromeOptions = new ChromeOptions();

		chromeOptions.addArguments("--log-level=3");

		chromeOptions.addArguments("--silent");

		WebDriver driver = new ChromeDriver(chromeOptions);
GitHub is a Web-based Git repository hosting service. It offers all of the distributed revision control and source code management (SCM) functionality of Git as well as adding its own features. Jenkins is an open-source continuous integration software tool written in the Java programming language for testing and reporting on isolated changes in a larger code base in real time. The software enables developers to find and solve defects in a code base rapidly and to automate testing of their builds. Objective:
In this tutorial we will discuss how to integrate Github with Jenkins and triggering the code.
Steps to follow: 1. Download jenkins.war from the website
Download Jenkins
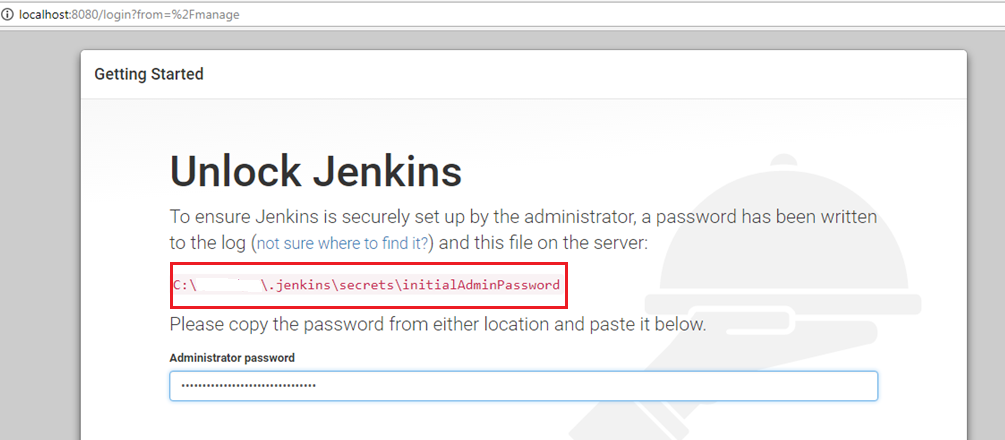
2. Start the jenkins from the command line 3. Access the Jenkins URL running on the port number 8080->http://localhost:8080 for the first time. Unlock jenkins by providing Initial Admin Password available in the command line from Step#2.
Unlock Jenkins by using InitialAdminPassword
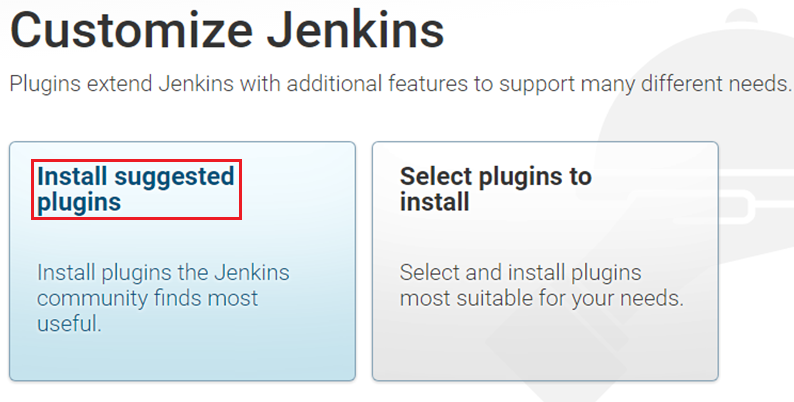
4. Customize the Jenkins by installing the Suggested Plugins.
Customize Jenkins by Selecting the Suggested Plugin
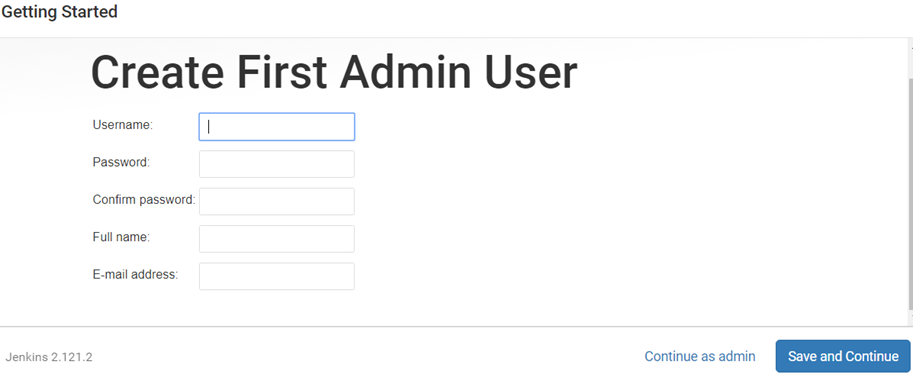
5. Create First Admin User. Provide username & password as admin/admin and Click on ‘Save and Continue’ button.
Jenkins First Admin User-admin/admin
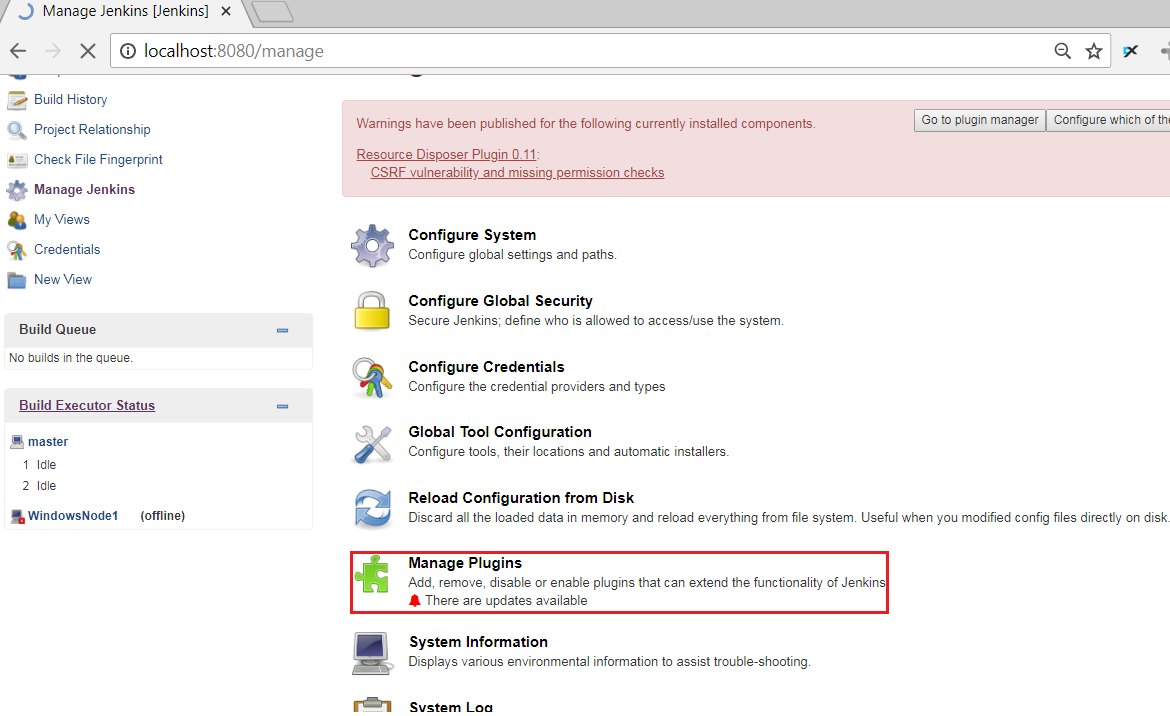
6. Once the Jenkins Configuration is done. Click on ‘Manage Jenkins->Manage Plugins’ link to install the required plugins.
Manage Jenkins->Manage Plugins->Upload .hpi to download any plugin in Jenkins.
8. Update Global Tool Configuration by updating the Location of the software install by navigating to ‘Manage Jenkins->Global Tool Configuration’. Provide the location of JDK installed in the server/localhost.
Global Tool Configuration
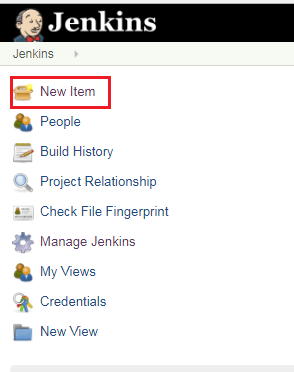
9. Create Jenkins Job by clicking on New Item.
Jenkins New Item
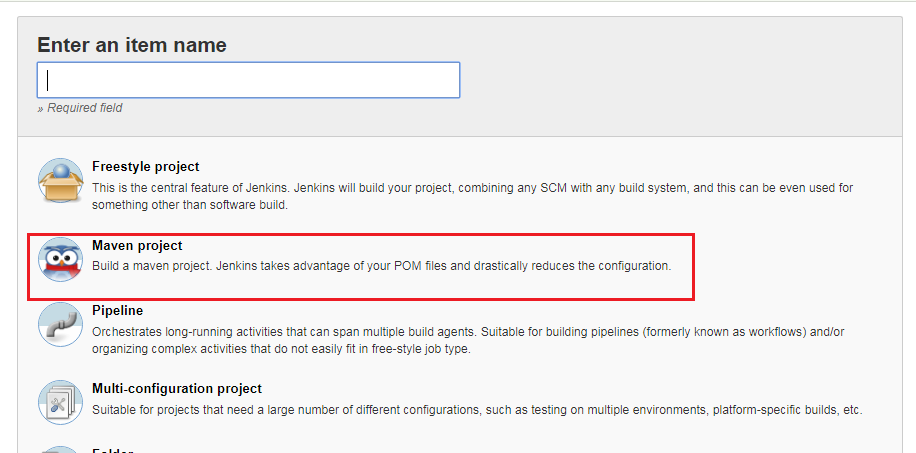
10. Select the Maven Project option and Provide the Item Name as .
New Item->Maven Project
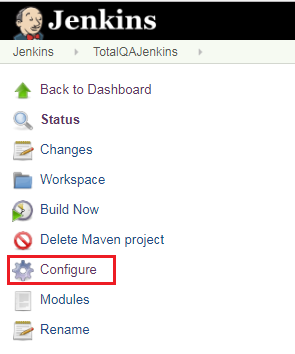
11. Click on Configure.
Configure Jenkins
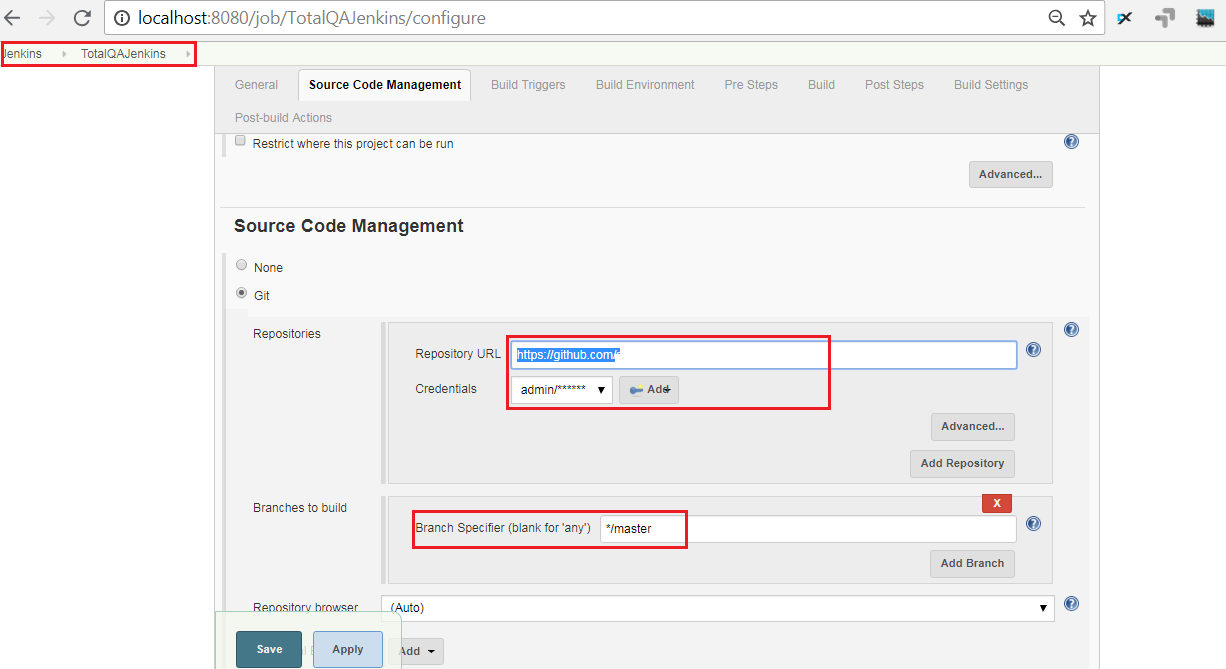
12. Provide the Github Repository URL and select the Branch.
Jenkins-Github Repo->Master branch
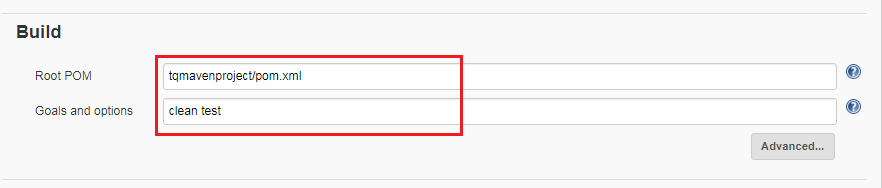
13.Provide the Location of pom.xml and mention Maven Goals.
Jenkins – Maven pom.xml
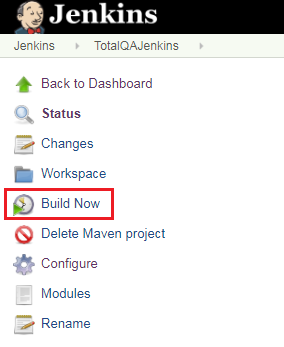
14. Click on Build Now.
Jenkins->Build Now
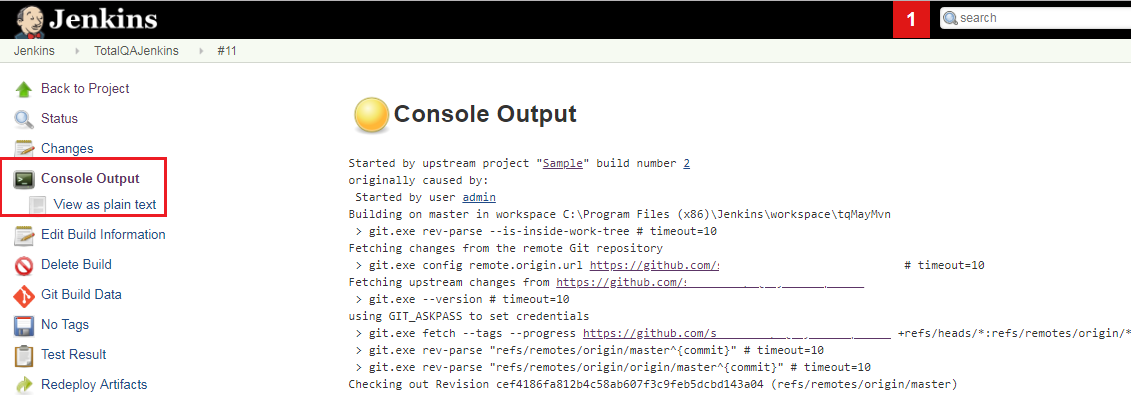
15. View the Results in Jenkins->Job Name->Job ID->Console Output.
Jenkins – Job #ID- Console Output- to view Results
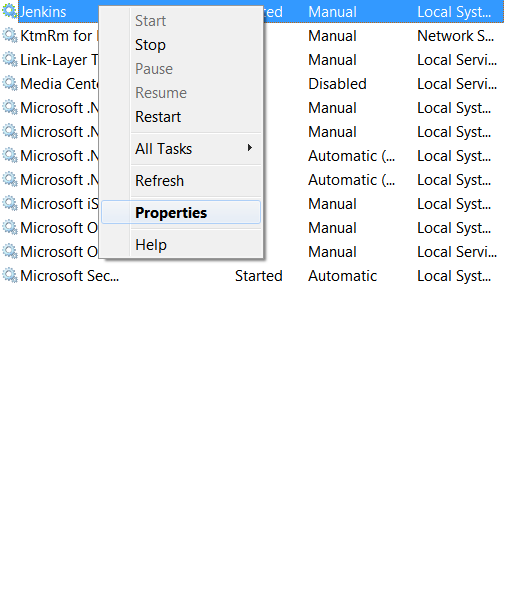
16. To view the Browser running in the back ground. Open the command . Select the Jenkins process.
Perform Right Click and do the steps.
Jenkins->Properties
Jenkins ->Service>Properties
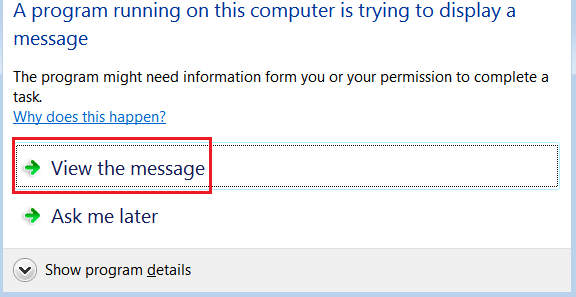
17. During the Execution the following dialog shows select the option ‘View the Message’ then
automatically we can view the execution on Browser.
In this example we will discuss how to automate the
Date Picker in Selenium WebDriver.
This example also gives details about
the usage of while loop.As we know for and while loop looks
similar in objective. But while loop, helps to execute the
block only when the condition is true.
Difference between for loop and while loop
The for loop is used when you know how many times to execute the block of statements.
In the case of while loop when you are unsure how many iterations are required to
complete the given expression.
DatePicker
The datepicker is tied to a standard form input field. Focus on the input (click, or use the tab key) to open an interactive calendar in a small overlay. Select the date it will display in the input text box.
Real Time DatePicker Example
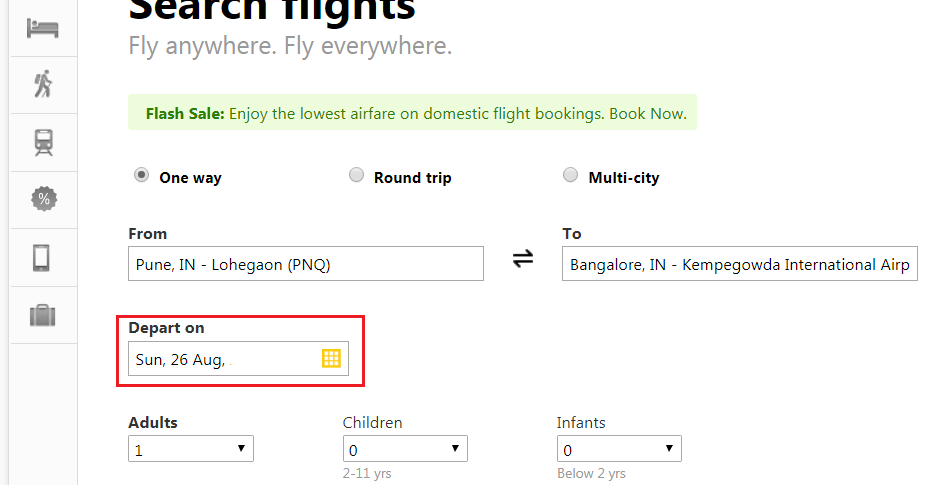
1. Access the Clear trip website using the following url: https://www.cleartrip.com/
2. Identify the Input Text box.
3. Provide the Future Date to select the Departs on.
DatePicker.java
Selenium WebDriver Program
DatePicker.java
1
2
3
4
5
6
7
8
9
10
11
12
13
14
15
16
17
18
19
20
21
22
23
24
25
26
27
28
29
30
31
32
33
34
35
36
37
38
39
40
41
42
43
44
45
46
47
48
49
50
51
52
53
54
55
56
57
58
59
60
61
62
63
64
65
66
67
68
69
import java.util.List;
import org.openqa.selenium.By;
import org.openqa.selenium.WebElement;
import org.openqa.selenium.chrome.ChromeDriver;
publicclassDatePicker
{
public static void main(String[]args)throwsInterruptedException
In this Example we will focus on Handling Auto Suggestion or
Auto Complete Textbox in Web Based Applications like Yahoo in Selenium WebDriver. This Example helps
to understand the usage of Synchronization – Explicit Wait in Real time Scenario’s.
Also usage of the method ExpectedConditions.visibilityOfAllElementsLocatedBy
in Selenium WebDriver. Definition of Auto Complete
Autocomplete or Auto Suggestion allows the browser to predict the value. When a user starts to type in a field, the browser should display options to fill in the field, based on earlier typed values. The auto complete works
with the following input types: text, search, url,email and datepickers.
Scenario
1. Open the browser
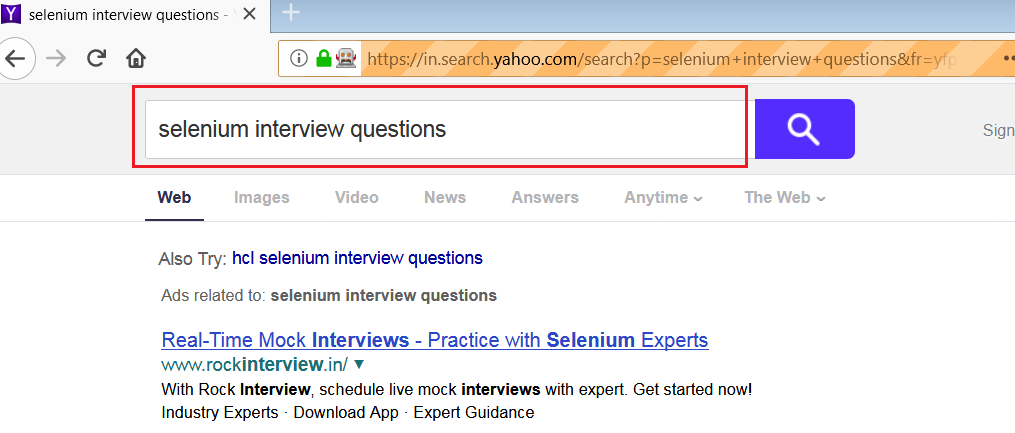
2. Enter the url https://in.yahoo.com/?p=us
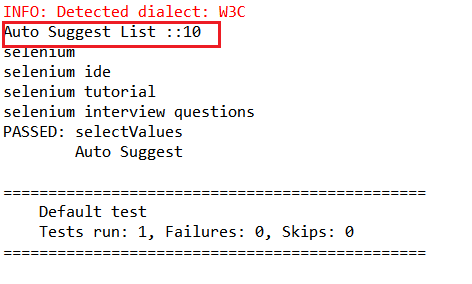
3. Type Selenium in the Search text box
4. It displays the options for Selenium
5. Select the text ‘Selenium Interview Questions’ from the display options.
In this tutorial we will focus on executing java programs for
practice without using IDE’s like Eclipse,
NetBeans,IntelliJ and also to run java programs
without installing the JAVA Software and compile
and run using the Online Editors.
Download and install the Java from this link -> Java SE Development Kit 8 Downloads
Executing the JAVA Programs without using IDE’s such as Eclipse,Net-beans, IntelliJ Editors
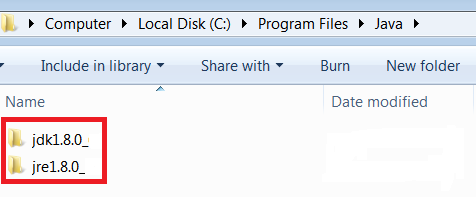
Make sure the java is installed in the location.
JAVA INSTALLATION DIRECTORY LOCATION
Basic Program in JAVA.
HelloWorld.java
1
2
3
4
5
6
7
8
9
10
11
12
13
14
15
16
17
18
19
20
21
22
23
24
publicclassHelloWorld
{
public static void main(String args[])
{
System.out.println("Hello World");
}
}
/* Commenting the below lines of code..
Objective: To print the Message "Hello World" in the console.
Points to be Noted:
------------------
ClassName: HelloWorld
{}- Curly Braces
()- paranthesis
[]- Square Brackets
; -Semi colon
"" - Double Quotes
. - period
*/
Compiling Java from the Command Line / Terminal on MAC or Linux.
1. To open command line Win + R keys on your keyboard. Then, type cmd or cmd.exe and press Enter
Win + R keys on your keyboard. Then, type cmd or cmd.exe and press Enter to open Command line.
2. Execute the following Command to Compile the Program.
javac HelloWorld.java
javac not recognized error: ‘javac’ is not recognized as an internal or external command, operable program or batch file error
comes when you try to compile a Java source file using javac command e.g. javac Helloworld.java
To overcome this you can give the path of the javac available in the program files.
Location of file javac available under the directory java/jdk.
Executing Java from the Command Line / Terminal on MAC or Linux.
open command line and execute the JAVA program using the follow command.
java HelloWorld
Executing the JAVA programs using Online Editors without downloading the software.
Practicing the java programs without installing the Java is easy using the below online
editor. This helps to Edit and execute the programs
Pre-requisites
Follow the Steps in the Link to download the sample REST Application and deploy on
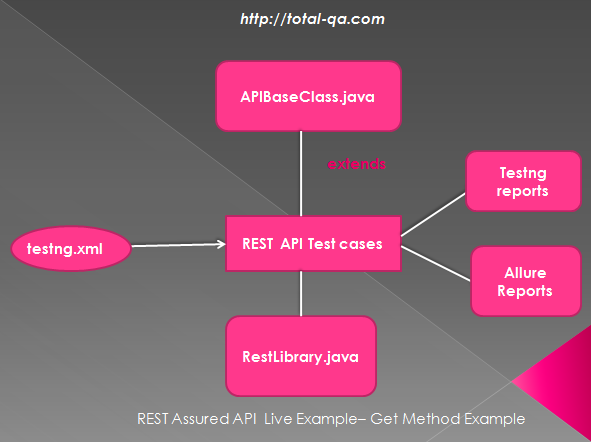
a tomcat Server-> REST API Application Live Example Implementing the Framework
All the below methods taken care as part of Framework
1. Method Response getServiceResponse(String serviceURL) added as part of the RestLibrary.java class which helps to provide the response based on the end point URL passed as a parameter.
REST API - GET Method Example
1
2
3
4
5
6
7
public static Response getServiceResponse(String serviceURL)throwsException
{
RequestSpecification request=RestAssured.given();
request.headers(provideHeaders());
Response response=request.when().get(serviceURL);
return response;
}
2. Methods used to store the Run time Value in setSysProperty() and fetch the value using getSysProperty().
REST API - GET Method Example
1
2
3
4
5
6
7
8
9
10
11
12
public static String getSysProperty(String propName){
String propValue=System.getProperty(propName);
return propValue!=null?propValue:null;
}
public static void setSysProperty(String propName,String propValue){
if(propValue!=null){
System.setProperty(propName,propValue);
}else{
System.setProperty(propName,(String)null);
}
}
3. This framework is implemented with Object Properties where the REST Endpoint url’s are
stored in the configuration.properties.
Sorting:
In computer science, a sorting algorithm is an algorithm that puts elements of a list in a certain order. The most frequently used orders are numerical order and lexicographical order or alphabetical order.
In Selenium WebDriver it is important to verify the Sort Functionality of the Dynamic HTML Content
is working as expected.
Sorting the Dynamic HTML Table-Selenium WebDriver & Java
Steps to Perform:
1. Retrieve the List from HTML Table.
2. Store the List in an Array
3. Sorting the items in the Array using Swapping. Swapping is the process of Exchanging the Values.
4. Click on Sort button in the WebPage.
5. Retrieve the List again.
6. Compare the Sorted Array generated in Step 3 with the List generated in Step 5.