Selenium WebDriver Installation – Eclipse IDE
JAVA Installation:
1) Go to Oracle official site for Java download
http://www.oracle.com/technetwork/java/javase/downloads/index-jsp-138363.html
and download Java platform , Standard Edition.
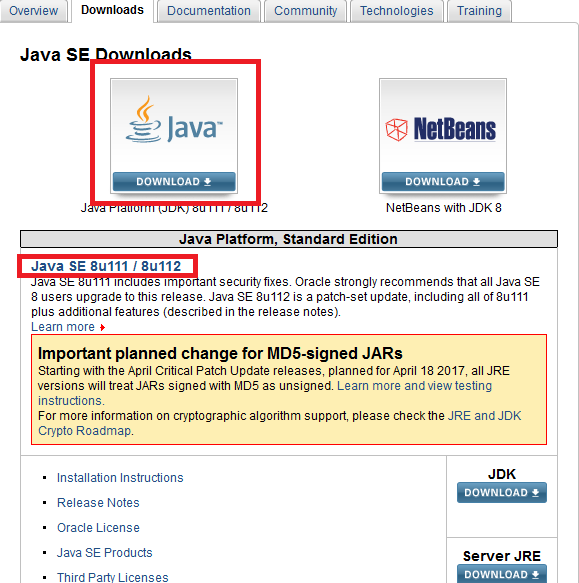
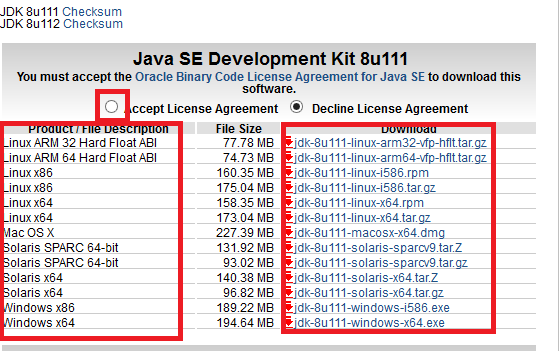
Step 2) Click on the download button, following screen would appear. Accept the License agreement for Java installation and choose amongst the various listed Java Development Kit’s. Select the one that best suits with your system configuration.
Eclipse IDE Installation
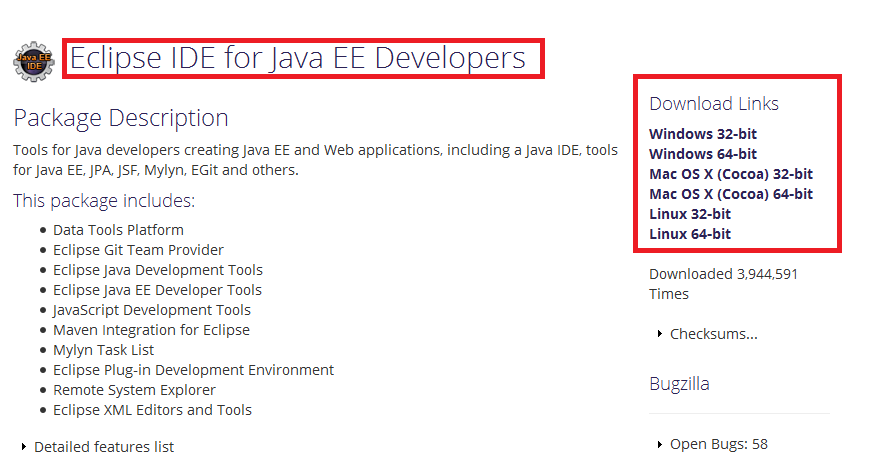
Step 1: Go to Eclipse official website and navigate to its download page, here is the URL – http://www.eclipse.org/downloads/packages/eclipse-ide-java-ee-developers/keplersr2 download Eclipse IDE for Java EE developers.
Make sure you opt and download the appropriate eclipse IDE as per your system configuration.
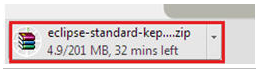
Step 2)Then, click on download button, the user is redirected to the fresh page securing information about the current download. Click on the download icon and you are done.
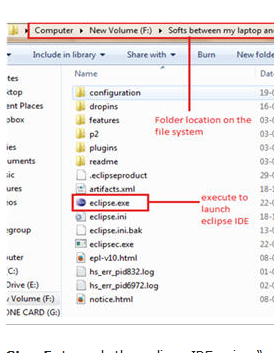
Step 3) Once downloaded, copy the folder and place it in the desired location in your file system.
Step 4) Extract the zipped folder, a folder named as eclipse can be seen. The folder embodies all the required application and source files.
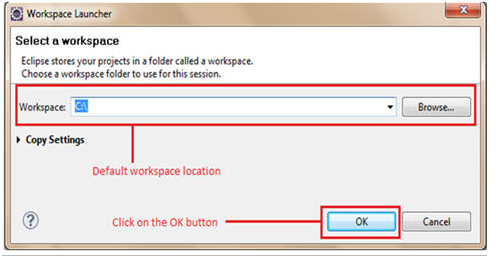
Step 5) The application will prompt you to specify the workspace location. Workspace is that location where all your eclipse projects will be residing. Enter/Browse the desired location for the default location and click on the OK button.
Selenium 3.0.1 Beta Version with Java Client Libraries downloads
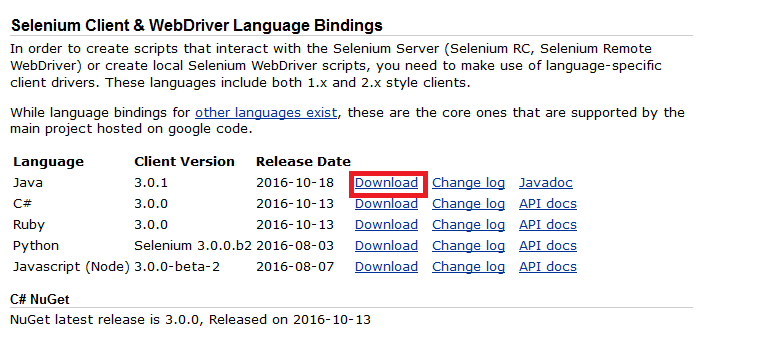
Step 1) Go to Selenium’s official website and navigate to its download page –
http://docs.seleniumhq.org/download/ Click on the download link for Java client libraries.
Step 2) Once you downloaded, copy the folder and place it in the desired location in your file system.
Step 3) Extract All from the zipped folder, a folder named as “selenium- java-3.0.1.zip” can be seen.
The folder embodies all the required jar files which enable users to create test scripts in Java.
![]()
Thus these libraries can be configured in Eclipse IDE.
Configuring Libraries with Eclipse IDE
Step 1) Navigate towards Eclipse IDE. Create a new Java project following as File ->New-> Java Project. Provide user defined name for Java project. Then the newly created project can be viewed at the right side of the screen in the package explorer panel.
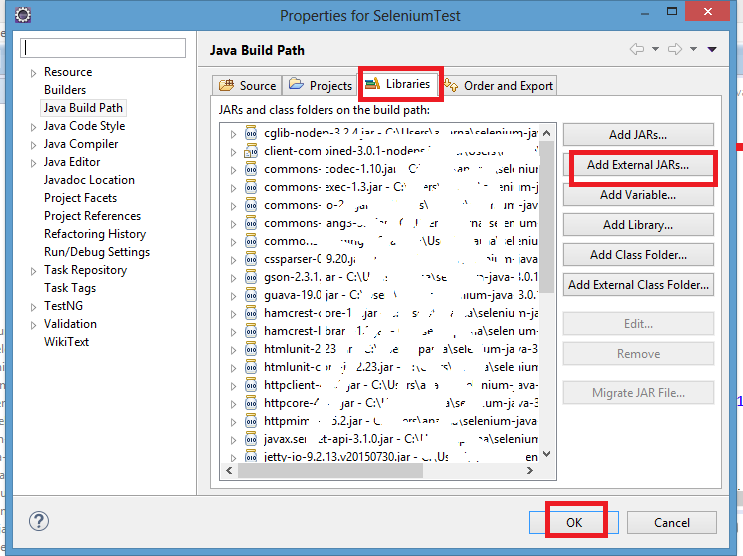
Step 2)Now configure(ADD) the libraries into Java project. Right click on the newly created project, click “Build Path” -> configure Bulid Path from the options.
Step 3)By default, “Libraries” tab open. If not, click on the “Libraries” tab. Then, Click on the “Add External Jars” button. Browse to the location where have saved the extracted folder for Java Client Libraries.
Step 4) Select all the JAR files present in the “Selenium-java-3.0.1” folder and click on open button within the dialog box.
Step 5) Click on the “OK” button so as to complete the configuration part of Selenium Libraries in Java project.
Available Drivers for Selenium WebDriver 3.0.1 version
Selenium 3 does not support default Firefox browser. Now onwards Selenium will support GeckoDriver, Which is a web browser engine. That means, When we work Selenium 3.0.1 with Firefox browser, we need to use separate driver which will interact with the browser.
Now we have to use webdriver.gecko.driver for firefox and we have to set the system property from Github.
Use GeckoDriver to launch Firefox:
Step 1) Download Gecko Driver from Github website. Download URL— https://github.com/mozilla/geckodriver/releases/tag/v0.9.0
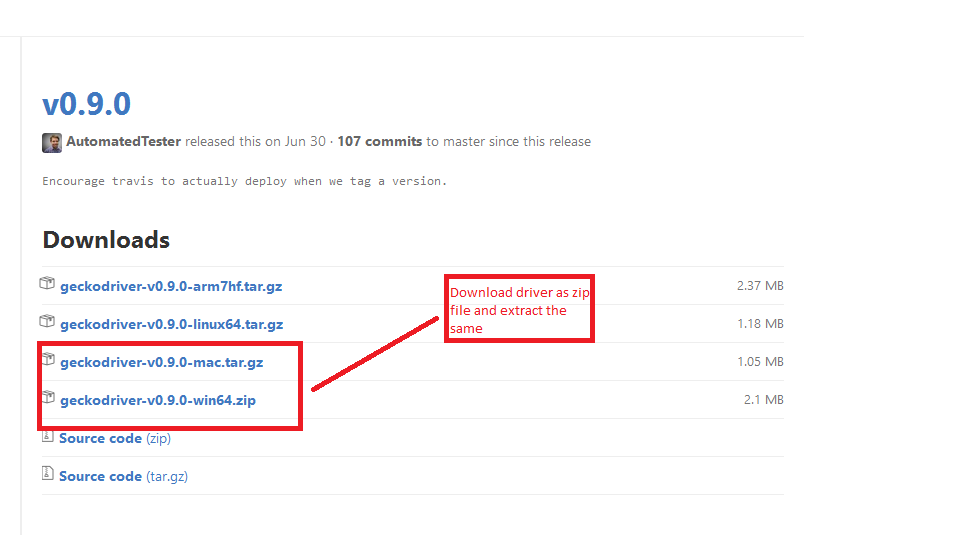
Step 2) Right click on the downloaded folder and Select Extract All to unArchive the folder.
![]()
Step 3) Choose the path or folder of desired location.
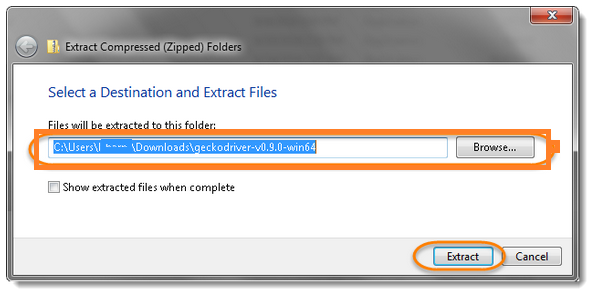
Once Extracted all, copy the folder(.exe) and place it as path for Gecko driver(system Property).
Set as system Property for firefox driver with path to GeckoDriver.exe
This completes the installation process. Then we can run java scripts.
Set System Properties for Gecko Driver
Code to set the System properties is
System.setProperty(“webDriver.gecko.driver”,”path to geckodriver.exe”);

Run this code verify that everything is working fine.
For Selenium Locators Refer to this Link:: http://total-qa.com/selenium/locators/