Fixing java.lang.CharSequence
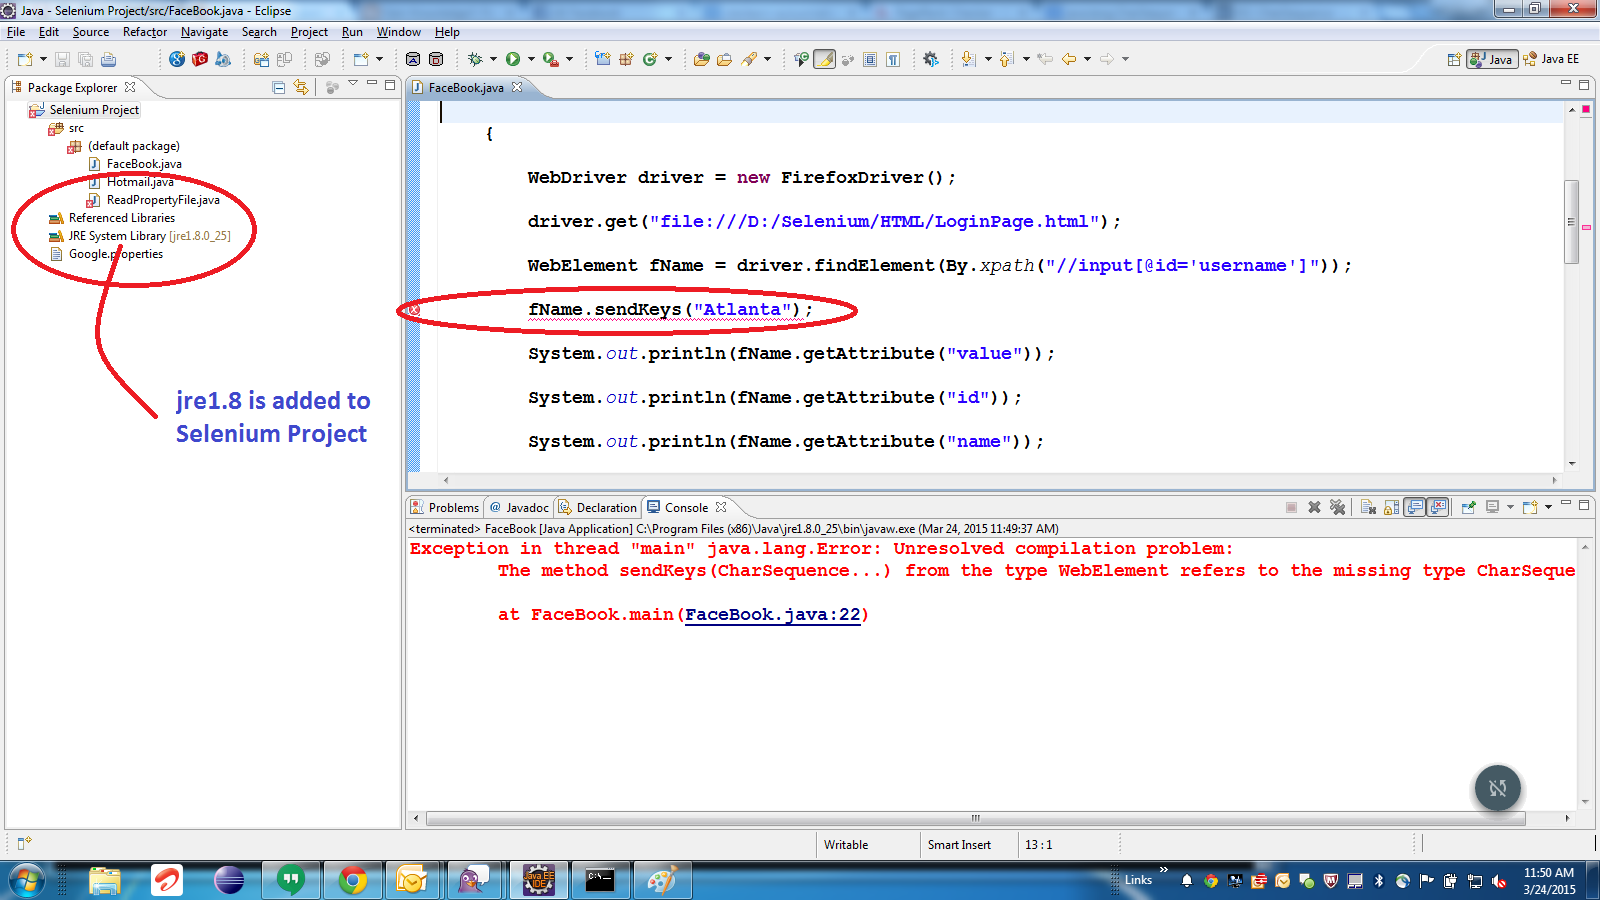
In Eclipse whenever we create a project automatically it will pick the latest jre installed in your system jre 1.8.0_25 which is in my case as shown below:

But in selenium webdriver when we use ‘sendkeys()’ method throws error java.lang.CharSequence cannot be resolved.
We can resolve this in two ways
1. Setting the Source level project should be greater then 1.5.
2. Roll back the jre 8 to jre 7 in Eclipse.
Steps for Setting the Source level of the Project to greater then 1.5
1. Select Project right click->Build Path->Configure Build Path.
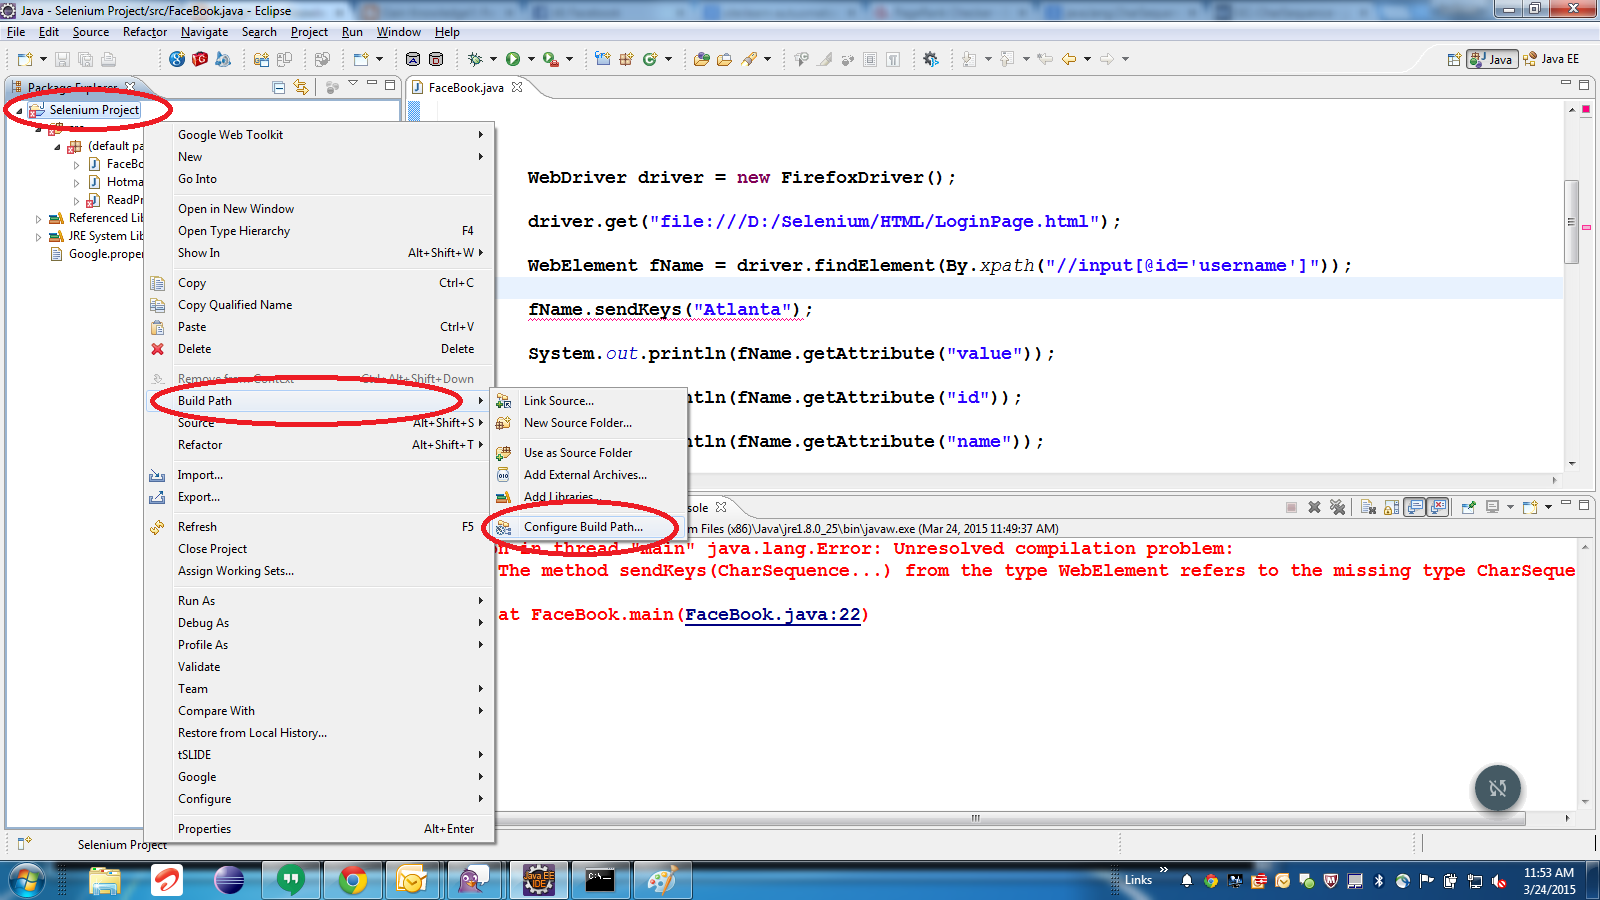
2. Select the Java Compiler option as shown below:
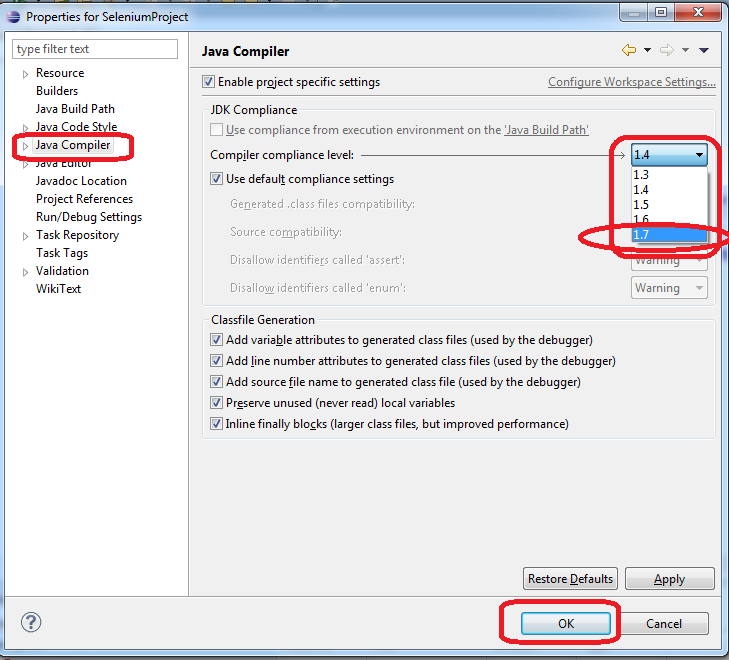
3. Select check-box for ‘Enable project specific settings”. Change the value from the compliance level drop down from 1.4 to 1.7. Click on ‘Ok’ button.

4. Verify the program now the issue will be resolved
Steps for roll-backing from jre 8 to jre 7
1. Select Project right click->Build Path->Configure Build Path.

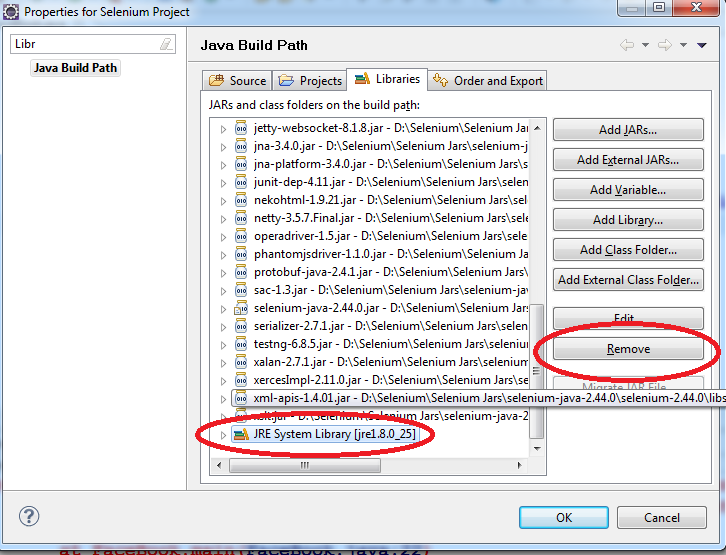
2. Navigate to Libraries. Select the jre 1.8 and click on remove.Do not worry we are not removing the jre 1.8 from the system, we are removing the jre 1.8 reference from this project.
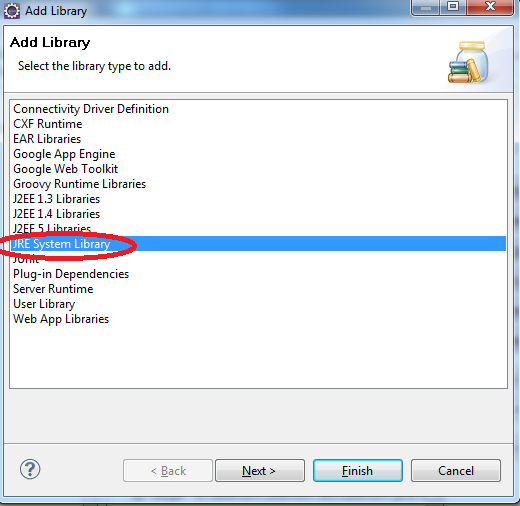
3. Click on Add Library Button->JRE System Library->Next.
4. Select Alternate JRE radio button. Click on ‘Installed JREs’ button.

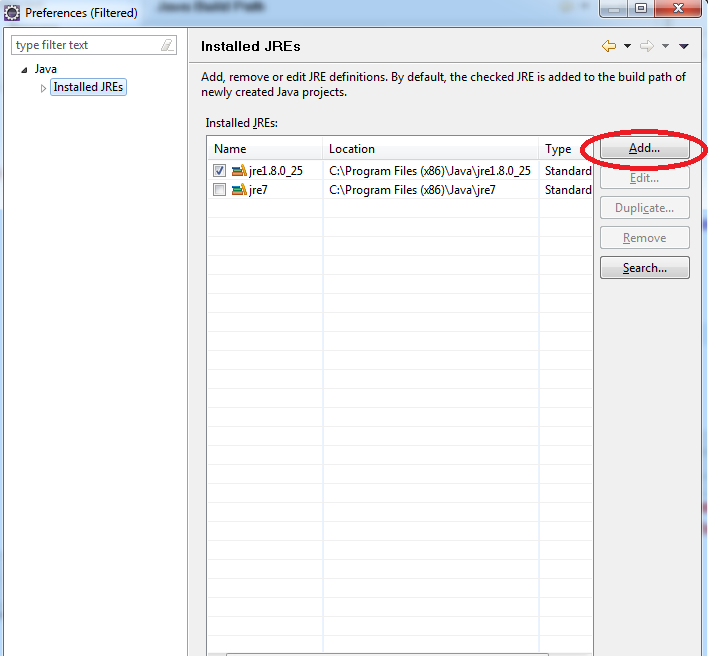
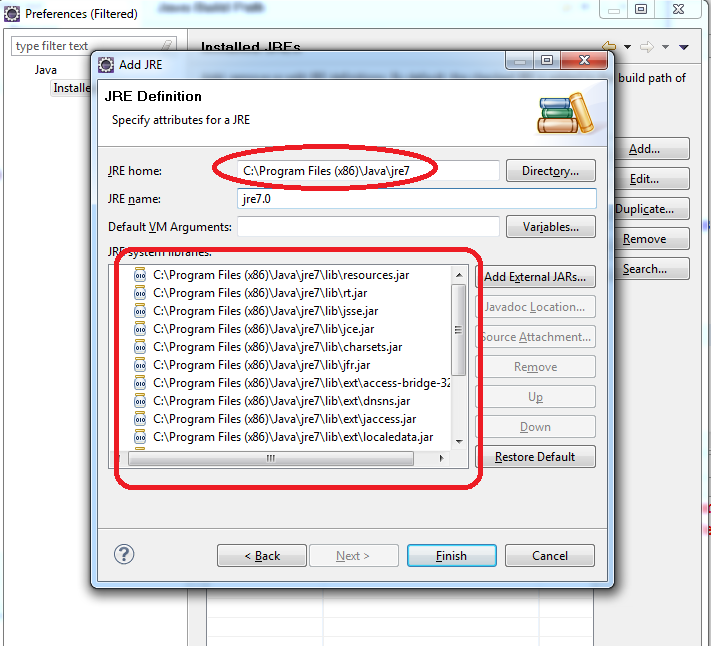
5. In the installed JREs click on Add and Navigate to the directory where the jre7 is installed.
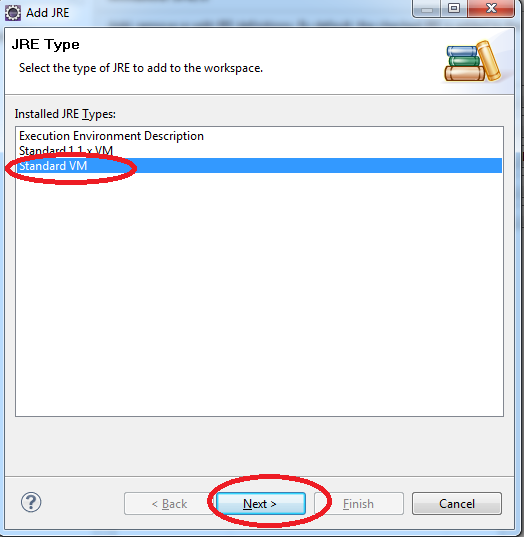
6. Select the JRE Type as ‘Standard VM’ and click on Next.
7. In my case JRE7 is installed in the following location.
C:\Program Files (x86)\Java\jre7
Provide JRE Name -> jre7.0
Click on Finish button.
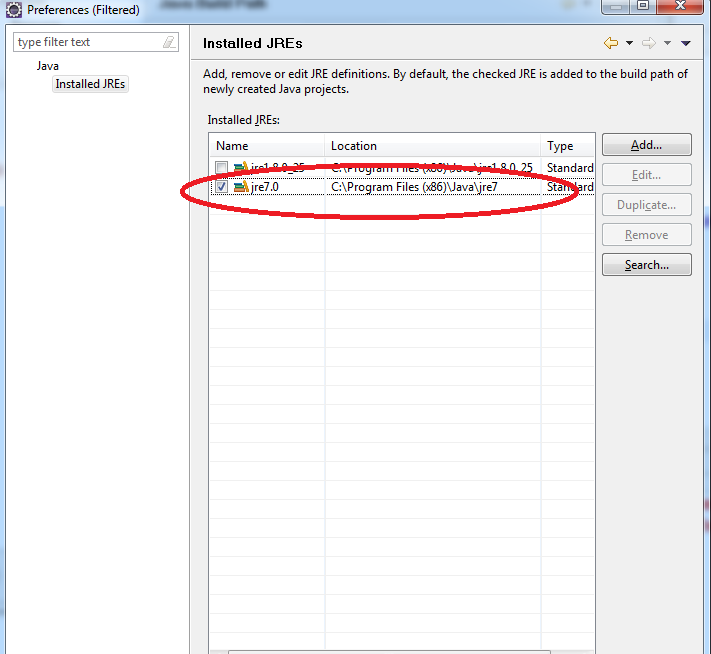
8. Select jre7.0 checkbox in the list of Installed JRE’s. Click on Ok button.
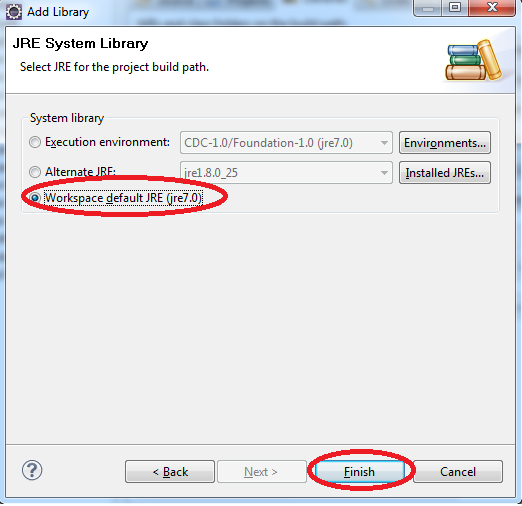
9. Select the workspace default jre as JRE 7.0. Click on Finish button.
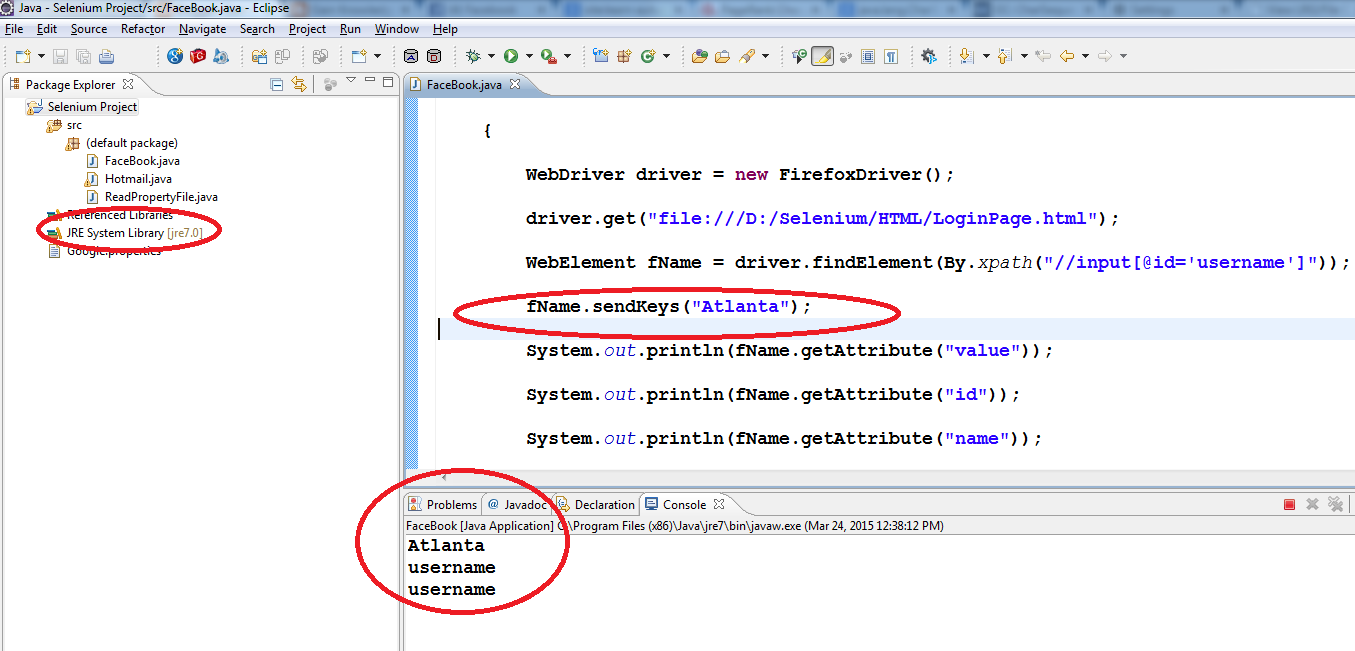
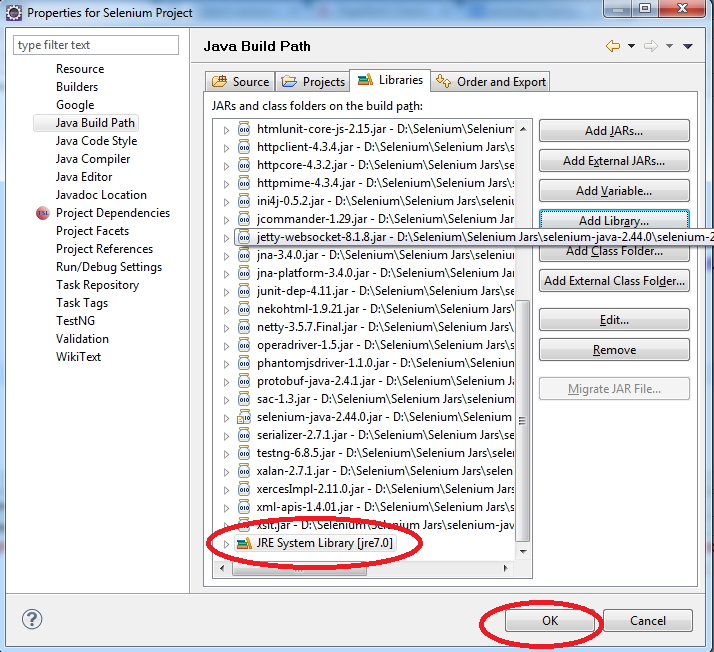
10. Verify the Java Build Path.
11. Verify the program now the issue will be resolved.
