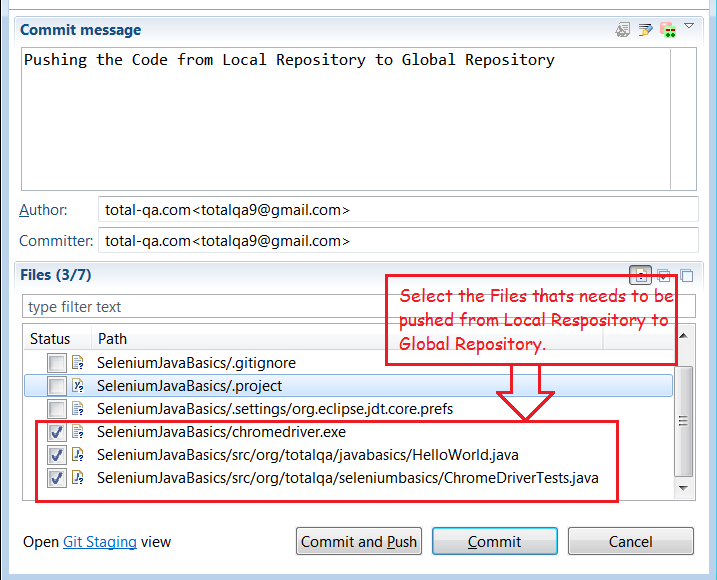
In this example we will discuss about the WebElement Methods available in Selenium WebDriver. Refer to the Link for WebElement API Methods.
Generally we mainly use methods like sendKeys(),click(),getText(). But they are so many other methods available to verify the input data entered by the user in the textbox. Verify the Css Attributes like color and font-size of the Web Element.
Is WebElement is a Interface or Class??
Answer:: Interface
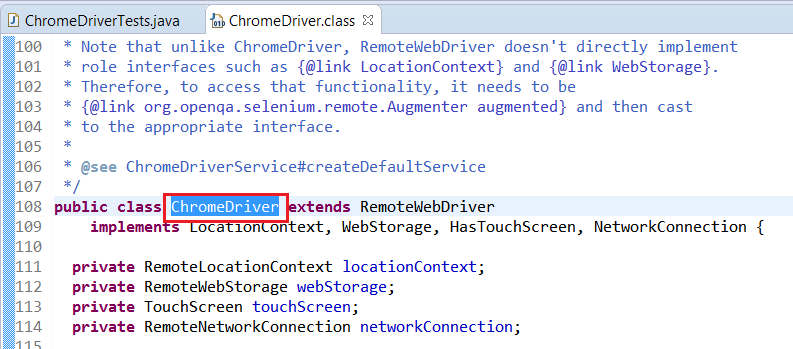
WebElement is an interface and all the abstract methods in the interface are implemented by the RemoteWebElement Class. Refer to the Link to get more information on Inheritance and Interfaces.
How do we know the Class which are implementing the Interface??
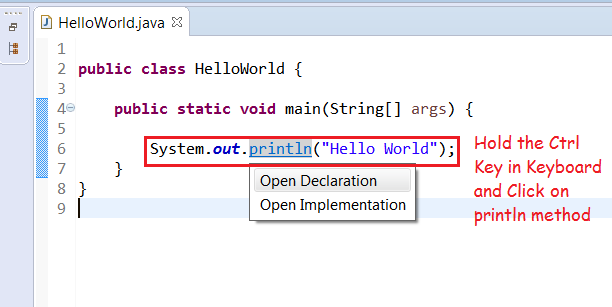
Hold the control button in the keyboard and place the mouse on the method and select Open Implementation as shown below to get the details of the classes which are implementing the interface.

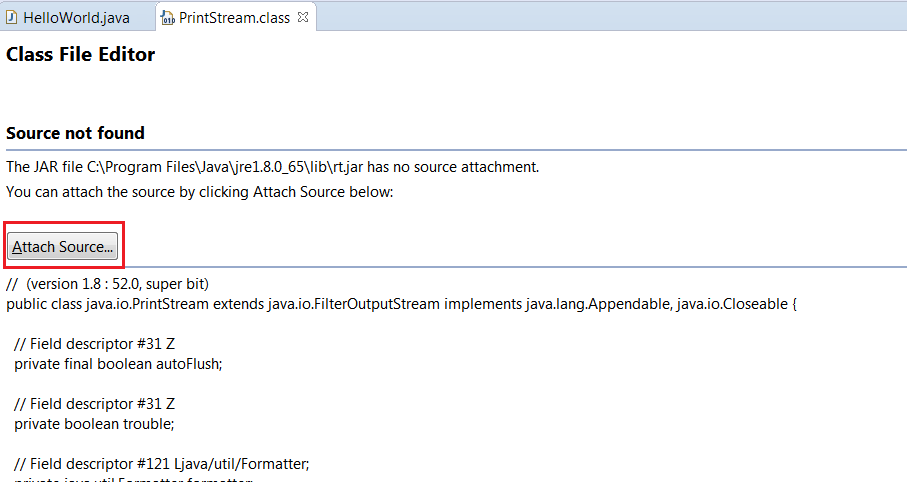
Classes implementing the interface WebElement
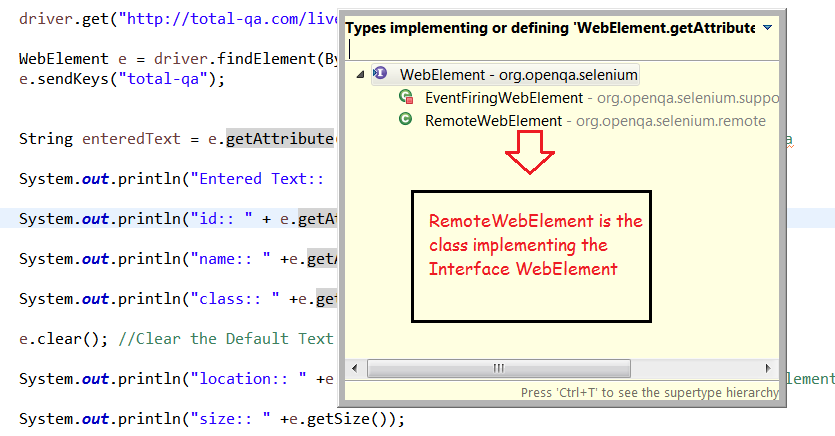
RemoteWebElement Class implementing the WebElement Interface
getCssValue("background-color")
Returns the Color of the WebElement
getCssValue("font-size")
Returns the font-size
getLocation()
Returns the Location of the WebElement. A point, containing the location of the top left-hand corner of the element
getAttribute("value")
Returns the input data entered by the user in the Text box using sendkeys() method.
Example for fetching the background-color and font-size of the Elements in the Web Page:
|
1 2 3 4 5 6 7 8 9 10 11 12 13 14 15 16 17 18 19 20 21 22 23 24 25 26 27 28 29 30 31 32 33 34 35 36 37 38 39 40 41 42 43 |
import java.io.IOException; import org.openqa.selenium.By; import org.openqa.selenium.WebElement; import org.openqa.selenium.firefox.FirefoxDriver; public class WebElementMethods { public static void main(String[] args) throws IOException { System.setProperty("webdriver.gecko.driver", "geckodriver.exe"); FirefoxDriver driver = new FirefoxDriver(); driver.get("http://total-qa.com/live-examples/loginpage/"); WebElement e = driver.findElement(By.id("username")); e.sendKeys("total-qa"); String enteredText = e.getAttribute("value"); //Retrieve the value entered as total-qa System.out.println("Entered Text:: "+ enteredText); System.out.println("id:: " + e.getAttribute("id")); System.out.println("name:: " +e.getAttribute("name")); System.out.println("class:: " +e.getAttribute("class")); e.clear(); //Clear the Default Text System.out.println("location:: " +e.getLocation());//Returns the Location of the WebElement. A point, containing the location of the top left-hand corner of the element System.out.println("size:: " +e.getSize()); System.out.println("color:: " +e.getCssValue("background-color")); System.out.println("fontsize:: " +e.getCssValue("font-size")); System.out.println("Tag Name:: " + e.getTagName()); } } |
Output:
 Entered Text::  total-qa

id:: username

name:: username

class:: textboxcolor padding

location:: (268, 849)

size:: (231, 30)

color:: rgb(255, 255, 0)

fontsize:: 13.3333px

Tag Name:: input
Conclusion:
In this example we have learnt how to use the WebElement Methods in Selenium WebDriver.