How to Attach Java Docs Source & Selenium Docs Source To Eclipse
In this tutorial we will learn how to attach the Java Source Code with attachments for the Java Projects
in Eclipse. This helps to understand the Coding Standards and Naming Conventions in Java. Also we can easily use this implement any logic in Selenium or Java Projects.
Attaching the Java Docs Source Code In Eclipse
1. Download the Java as per the steps mentioned in this tutorial.
JAVA Installation
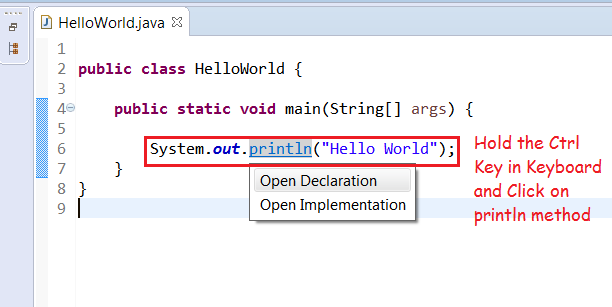
2. Write a Sample Program in Java.
|
1 2 3 4 5 6 7 8 9 |
public class HelloWorld { public static void main(String[] args) { System.out.println("Hello World"); } } |
3. Hold the Ctrl Button in keyboard and Click on ‘println’ method.
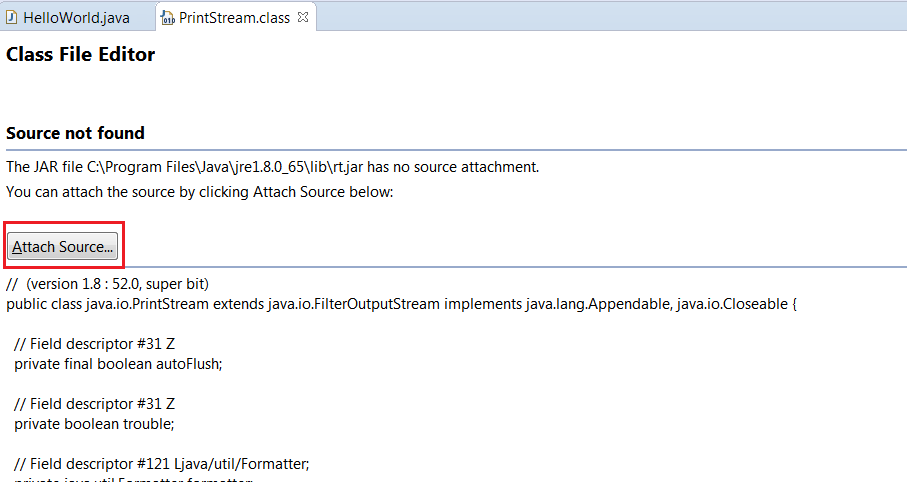
Attaching Java Documentation & Source Code
4. Click on Attach Source Button.
Attaching Source
5. Click on External File Button to navigate to the location of the Java JDK [Java Development Kit] Source code.
Add the src.zip and click on OK button.
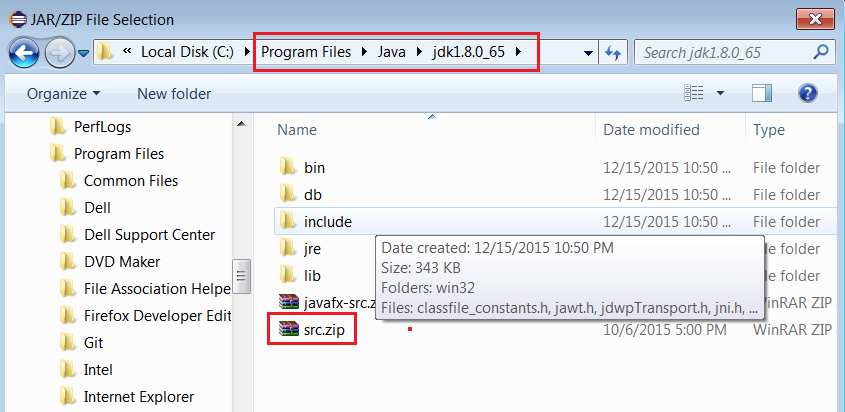
Adding src.zip to the project.
6. Hold the Ctrl Button and Click on ‘println’ method.
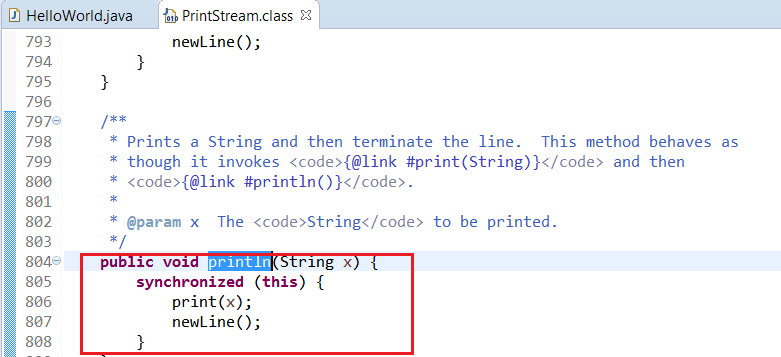
Java Source Code
Attaching the Selenium Docs Source Code In Eclipse
1. Write a Sample Program in Selenium WebDriver.
|
1 2 3 4 5 6 7 8 9 10 |
public class ChromeDriverTests { public static void main(String[] args) { System.setProperty("webdriver.chrome.driver","chromedriver.exe"); ChromeDriver driver = new ChromeDriver(); driver.get("http://total-qa.com"); System.out.println(driver.getTitle()); } } |
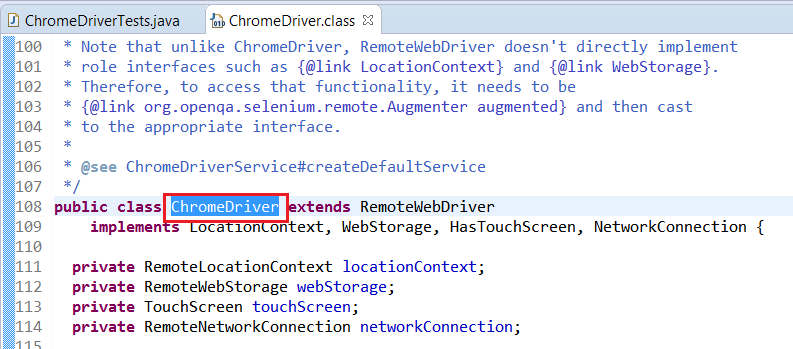
2. Hold the Ctrl Button in keyboard and Click on ChromeDriver Java Class.

Selenium Chrome Driver
3. Click on Attach Source Button and click on External File Button.

Attaching ChromeDriver.java Source Code
4. Navigate to the Location where the Selenium Libraries are downloaded.
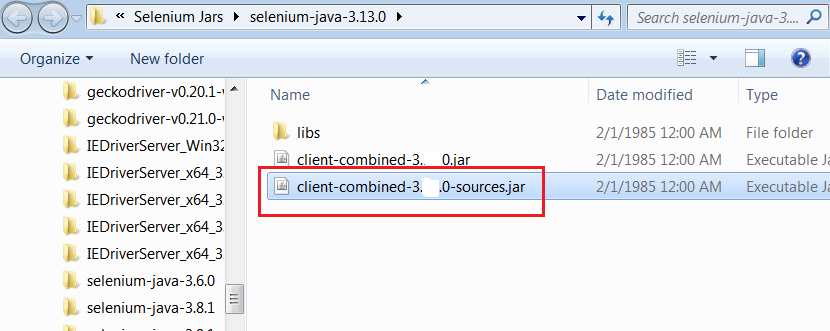
Attaching Client Combined Sources Jar file
Refer to the Step-By-Step Configuration of Selenium Jars in Eclipse. Configuration of Selenium Jars in Eclipse
5. Hold the Ctrl Button and Click on ‘ChromeDriver’ Java Class.
org.openqa.selenium.chrome.ChromeDriver.java