Pipelines allows Jenkins to support continuous integration (CI) and Continous Delivery (CD). Pipeline are nothing but the Jenkins jobs the simple text scripts are based on Groovy Programming language. Pipeline terms such as “Step”, “Node” and “Stage” are subset of vocabulary using in Jenkins.
Step:
It defines the Single task which is part of the sequence tell Jenkins what to do.
Node:
A “node” means any computer that is part of your Jenkins installation.
Stage:
A “stage” is comprised of one or more build steps.
Pre-requisites:
Download Jenkins 2.0 from this link https://jenkins.io/download/ which is recommended.
Core Pipeline Plugin
Plugin Name – Pipeline:
In this tutorial we will learn about using Pipeline plugin and its usage.
It allows Jenkins to execute the Pipeline API and Basic Steps.
Download the Pipeline Plugin from this link https://wiki.jenkins.io/display/JENKINS/Pipeline+Plugin
SCM’s:
Git Plugin
Cloud Plugins{optional}:
Docker
ec2
Jenkins Environmental Variables:
echo “BUILD_NUMBER” :: $BUILD_NUMBER
echo “BUILD_ID” :: $BUILD_ID
echo “BUILD_DISPLAY_NAME” :: $BUILD_DISPLAY_NAME
echo “JOB_NAME” :: $JOB_NAME
echo “JOB_BASE_NAME” :: $JOB_BASE_NAME
echo “BUILD_TAG” :: $BUILD_TAG
echo “EXECUTOR_NUMBER” :: $EXECUTOR_NUMBER
echo “NODE_NAME” :: $NODE_NAME
echo “NODE_LABELS” :: $NODE_LABELS
echo “WORKSPACE” :: $WORKSPACE
echo “JENKINS_HOME” :: $JENKINS_HOME
echo “JENKINS_URL” :: $JENKINS_URL
echo “BUILD_URL” ::$BUILD_URL
echo “JOB_URL” :: $JOB_URL
Note:
Any of the Jenkins Environmental Variables are used in the Pipeline Script in the following way:
echo ${env.BUILD_NUMBER}
Creating a Simple Pipeline Script:
1. Open the Jenkins Home Page URL. Click on New Item in Jenkins home Page.
2. Provide the new item name. Select the Pipeline option. Click on OK button.

Jenkins Pipeline Script Example
3. Open the Jenkins job created in Step2. Click on Configure->Pipeline Syntax link to generate the Script automatically.
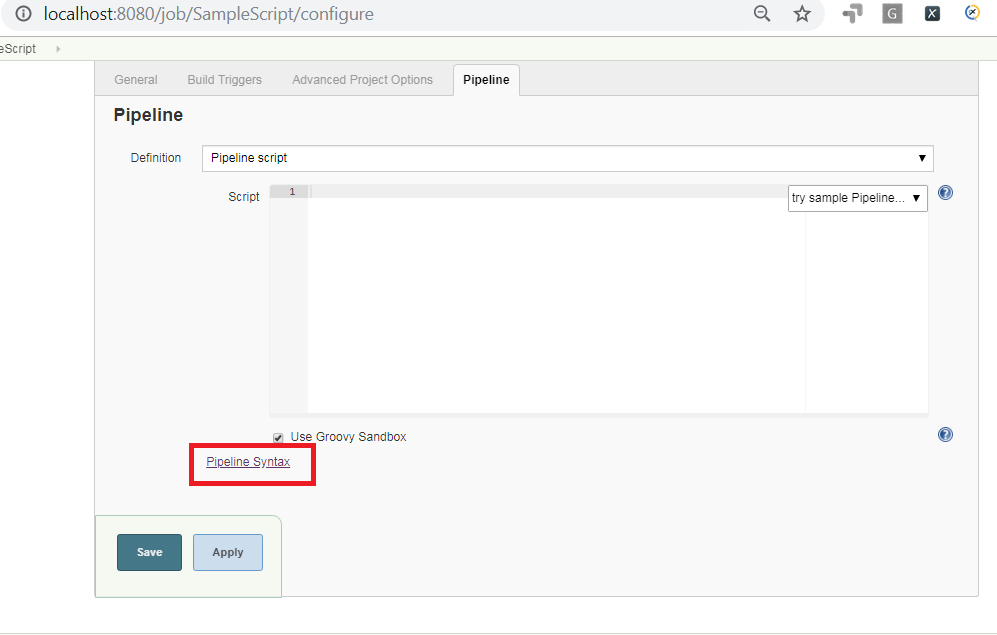
Pipeline Syntax Example
3. Create a Jenkinsfile with the pipeline script mentioned below:
Github Repository-> Link
|
1 2 3 4 5 6 7 8 9 10 11 12 13 14 15 |
pipeline { agent any stages { stage('Execute Selenium Tests from Github Repo Using Jenkins 2.0 Pipeline') { steps { echo 'Execute Tests' echo "Running ${env.BUILD_ID} on ${env.JENKINS_URL}" echo "Jenkins Workspace ${env.WORKSPACE}" bat "mvn -f openmrs clean" bat "mvn -f openmrs test -P QA" } } } } } |
4. Configure the Jenkins job created in Step2. Refer to the Jenkinsfile from the Github Repository.

Jenkins Pipeline SCM Configuration
5. Click on Build Now to execute the Job Successfully.
6. Open the JOB Console to view the Results.
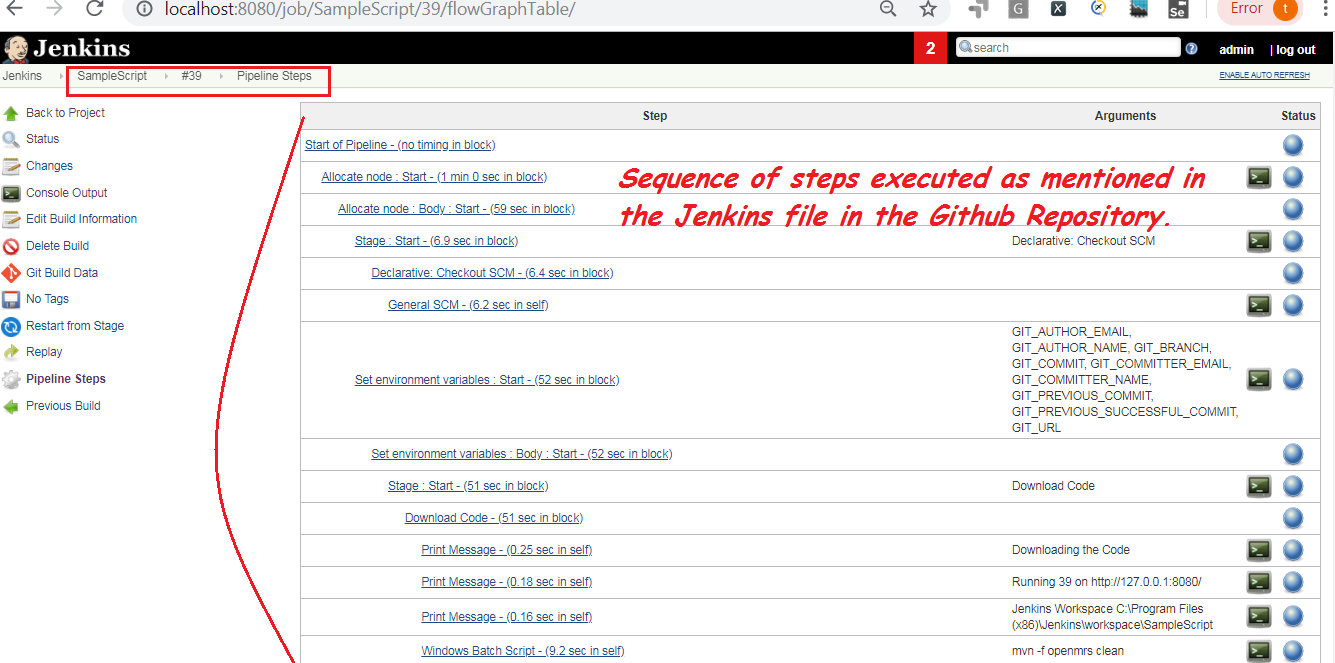
JenkinsfileExecution


![[branch "PullRequestError"] remote = origin merge = refs/heads/PullRequestError](http://total-qa.com/wp-content/uploads/2019/04/GitConfigFile.png)