Xpath Helper,Chropath Plugins,Javascript Console for Chrome Browser
In Selenium they are totally 8 Locators. Out of all Locators, Xpath is very important which helps to identify the WebElements. Identifying the Xpath in Firefox Browser is easy using Firebug and Firepath plugins. But Firebug and Firepath plugins are not compatible with latest version of Firefox Quantum. How do we over come this is mentioned in detail in this Tutorial Link.
Now, how are going to identify the Xpath on Chrome Browser using the following
Xpath Helper
ChroPath
Javascript Console
Usage of Xpath Helper:
1. Open Chrome Browser and access the below Link to add the Xpath Helper plugin to the Chrome Browser.
Xpath Helper Link:
https://chrome.google.com/webstore/detail/xpath-helper/hgimnogjllphhhkhlmebbmlgjoejdpjl?hl=en
2. Once the plugin is added it is visible on the right hand side of the browser as shown below:

Xpath Helper Plugin
3. Open New browser and Hit Ctrl+Shift+X to open the Xpath Helper. Hold the Shift button and mouse hover on the Element to view the Xpath and Results.
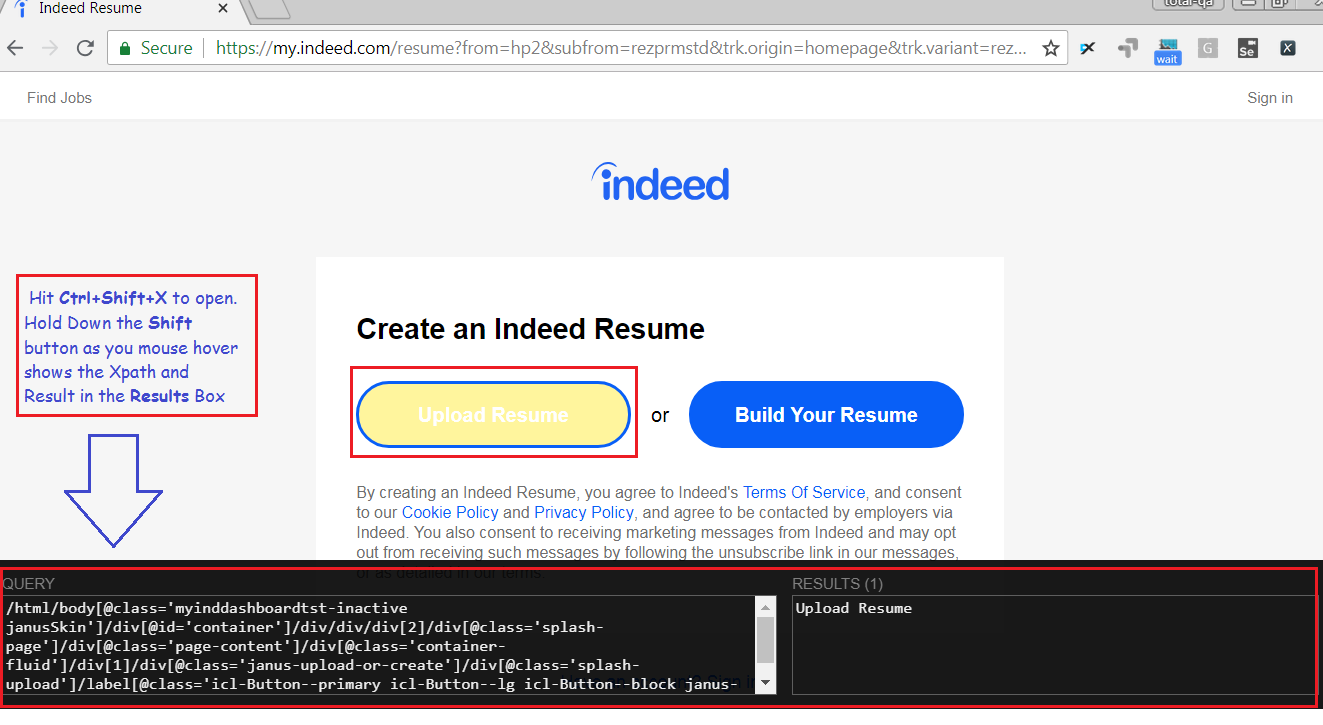
Hit Ctrl-Shift-X to open Xpath Helper.Hold down Shift as you mouse over elements on the page to view the Xpath and the Results .
Usage of ChroPath:
This plugin is developed by Sanjay Kumar.
1. Open Chrome Browser and access the below Link to add the ChroPath plugin to the Chrome Browser.
ChroPath Link:
https://chrome.google.com/webstore/detail/chropath/ljngjbnaijcbncmcnjfhigebomdlkcjo
2. To open ChroPath right click on any Element and Select Inspect as shown below:
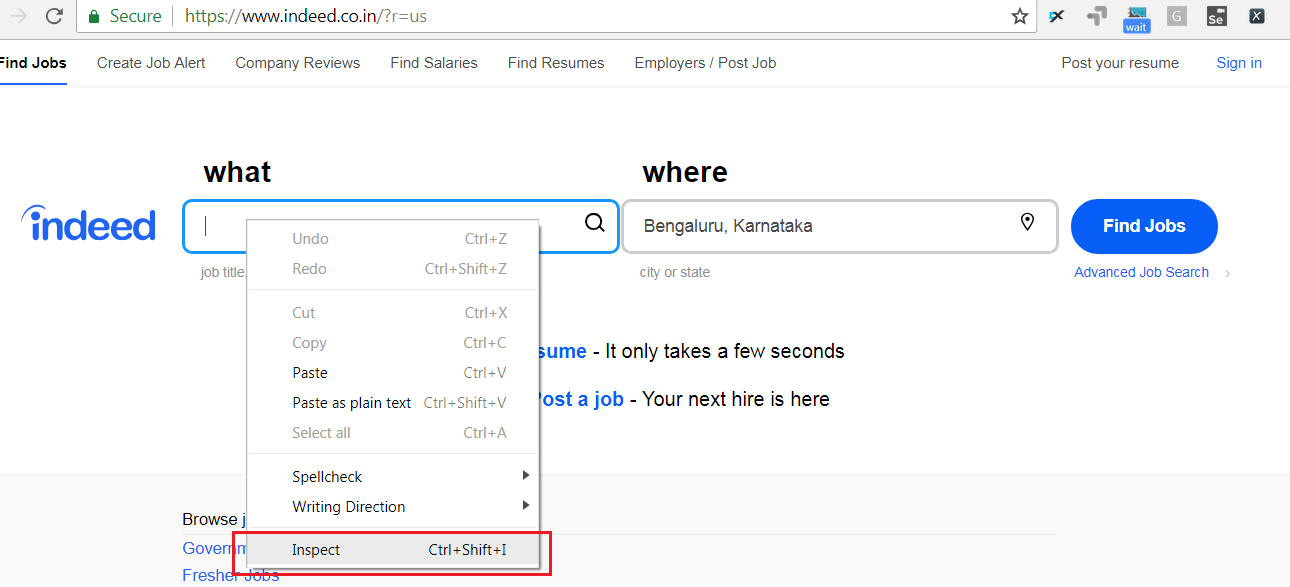
Inspecting an Element in Chrome Browser
3. Open Chropath as shown below.
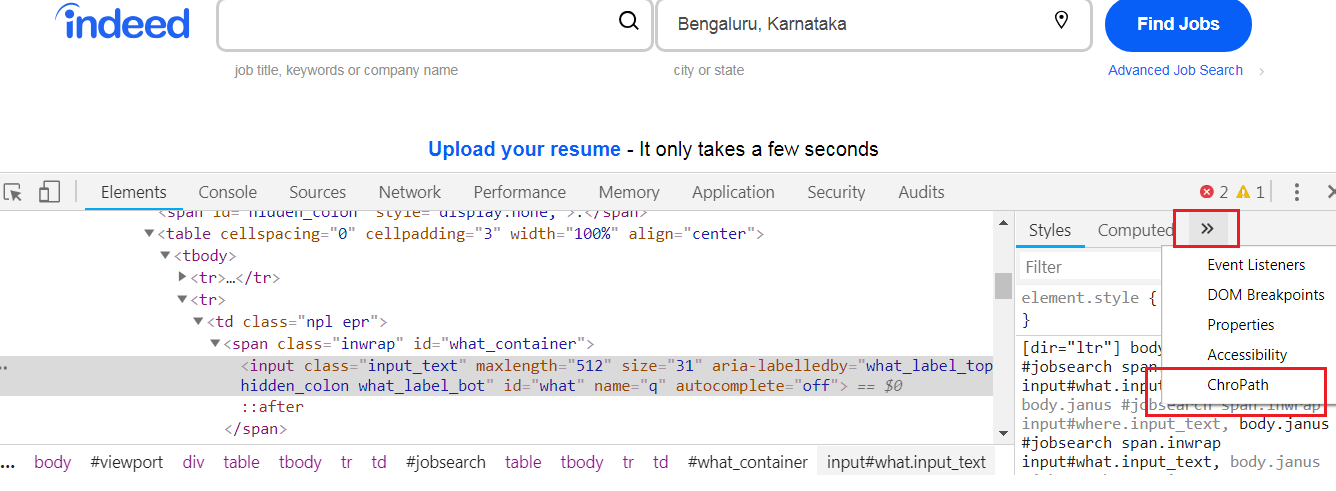
Select ChroPath Option
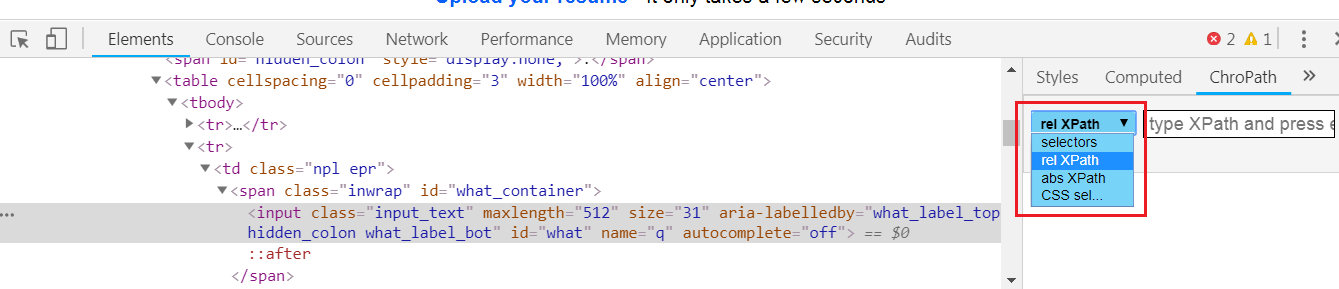
4. Select the Relative Xpath Option in ChroPath.
5. To generate XPath/CSS inspect element or click on any DOM node, it will generate the unique relative XPath/absolute XPath/CSS selector for the selected node.
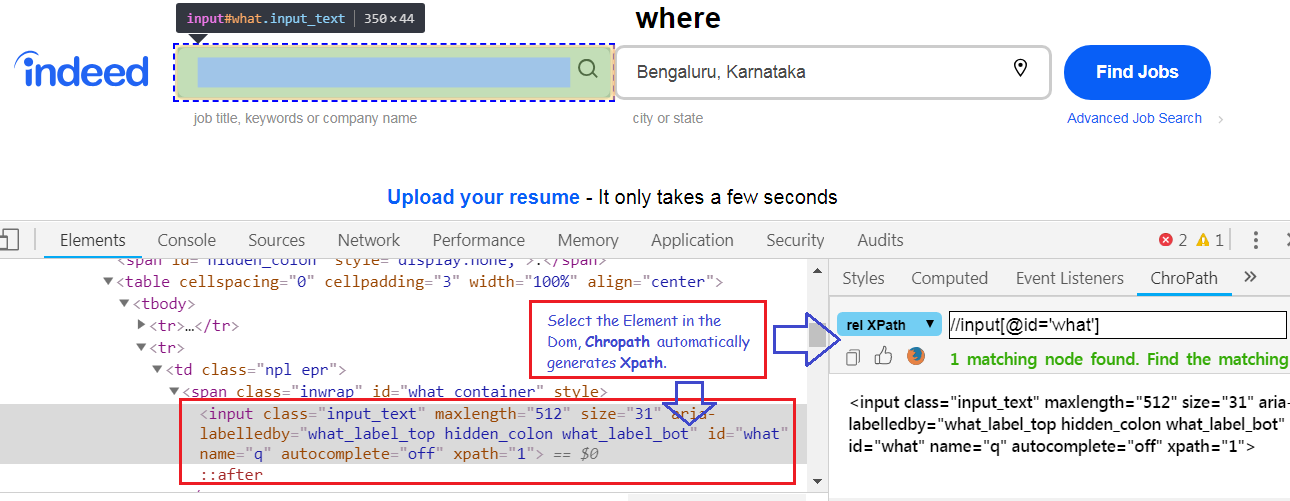
Chropath Relative Xpath,Absolute Xpath,Css
Usage of Javascript Console:
1. Javascript Console which is part of Developer tools in Chrome Browser helps to identify the Xpath and also helps to execute all the Java Script Commands. For reference to the Javascript Commands click on this link https://www.w3schools.com/js/default.asp
2. Right click on any Element and Select Inspect as shown below:
Inspecting an Element in Chrome Browser
3. Refer to the Commands for Reference. Type the below commands in the console to view the results.
           console.log("message")

           $x("//img")

           $x("//input")

           $x("//input[@id='what']")

Chrome Browser Developer Tools – Javascript Console
Note: Chropath is also available fore Firefox as well. Please refer to the link below:
https://addons.mozilla.org/en-US/firefox/addon/chropath-for-firefox/